
Table of Contents Show
- 1. Pick Your Planting Date Carefully
- 2. Use Good Quality Seeding Mix for Best Results
- 3. Pay Attention to the Planting Depth for Each Variety
- 4. Use a Spray Bottle to Water Your Seeds Until They Germinate
- 5. Retain Moisture Through the Germination Process
- 6. Give Your Seedlings All the Sunlight They Can Get
- 7. Apply a Specially Formulated Fertilizer Once the Seedlings Have Sprouted
- 8. Thin and Transplant Your Seedlings Into Larger Pots
- 9. Gradually Acclimatize Your Seedlings Prior to Transplanting
- 10. Know the Right Time to Transplant Them Into the Garden
Getting ready to plant those seeds you brought back from the garden center or that have just arrived from your order? It’s true that nature has worked hard at ensuring the survival of these various plant species by making it quite easy for them to reproduce by seed, and so it would seem that just dropping a seed into some soil, adding water, and then waiting is all that’s required; you should expect healthy, happy seedlings in a few short weeks just itching to get out into your gardens.
Sure, that may work if you’re not concerned about germination rates or the vigor of your young seedlings, but let’s face one critical reality here. We’re all northern gardeners, and that means we have short growing seasons where we’re trying to coerce the most out of vegetables and flowers that would probably prefer a much longer, hotter growing season than we can provide.
It is therefore in our best interests to give our young seedlings the best beginnings possible. The good news is, there’s a lot we can do as indoor gardeners to start them off right.
Here, we want your summer flowers to be ravishing and your fall harvest to be bountiful. So, to help you get your spring babies off to the best start possible, we’ve asked our staff horticultural experts to compile a list of 10 key tips for starting seeds indoors. Without further ado, here’s what they have recommended;
1. Pick Your Planting Date Carefully
When starting seeds indoors, the key is to know how early you can plant them. For the most part, start your seeds 6-8 weeks prior to the optimal safe transplanting time for your particular region (see Tip 10 below).
Remember plants require longer or even shorter germination times when propagating from seed, so refer to the label for accurate information. To estimate a seeding date, identify your last frost date and count backward.
If you start your seeds too early, the seedlings may get spindly and weak when it comes time to transplant. If too late, you’ll be losing valuable growing time and possibly desired bloom or fruit production.
2. Use Good Quality Seeding Mix for Best Results
Using an appropriate medium will improve germination rates, develop stronger and healthier seedlings and make transplanting into the garden easier.
Yes, it’s true that your grandmother might have gotten by using a little garden soil that was set aside in fall, but today’s starting mixes have been scientifically optimized for best results using mixes of peat moss, vermiculite, and topsoil infused with booster fertilizers.
However, some seeds will actually do better with grandma’s heavier soil, so consult the directions on the package to verify the heaviness of the soil required to achieve optimal germination.
3. Pay Attention to the Planting Depth for Each Variety
Planting depth does matter. Planting seeds too deeply may result in slower germination, failure to germinate, or lower yields. By planting too shallow, you may stress the seedlings, making it harder for them to get a good footing in the soil.
Always check for the optimal planting depth specified on the seed package for each variety. For the most part, the best planting method is to poke a small hole in the soil with your finger or a pencil to the suggested depth, drop in 2-3 seeds (or as indicated), and then sprinkle soil by hand to cover the hole.
Some varieties require a simple dusting of soil or sand after they have been laid on a lightly compacted growing medium.
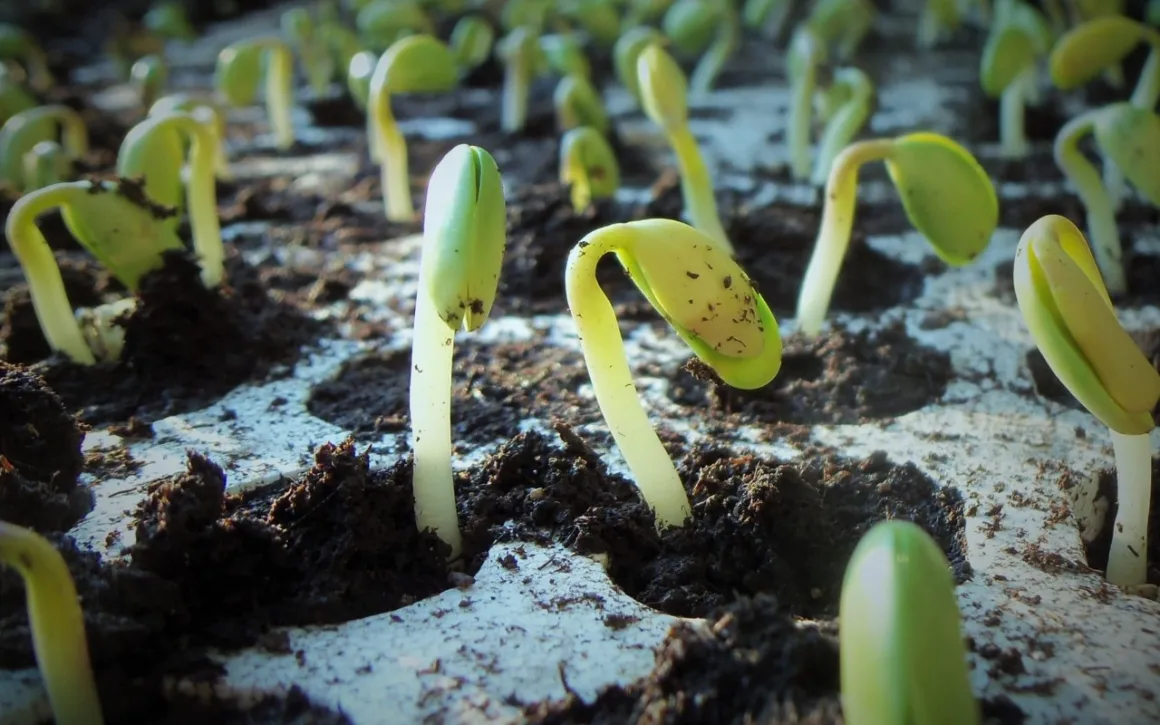
4. Use a Spray Bottle to Water Your Seeds Until They Germinate
Once planted, you’ll want to disturb the seeds as little as possible while they’re in the process of germinating. Torrents of tap water can be very disruptive. Consider using a spray bottle to mist the surface of the soil until the water soaks deep inside.
If tap water is highly chlorinated, consider watering your seedlings with distilled or bottled water. Melted snow works well but should likely be boiled to remove any unwanted impurities.
5. Retain Moisture Through the Germination Process
Covering your planting trays with clear plastic to keep the germination environment as humid as possible is a great way to ensure a constant supply of moisture to the seeds. Commercial planting trays are often sold with clear plastic covers, which fit tightly over top.
You can also cover seeding boxes with clear plastic bags secured to the bases with elastic bands. Be sure to discontinue the covering once the seedlings have sprouted.
For larger-scale seeding, purchasing or manufacturing a covered seeding chamber will help to keep an overall environment conducive to germination without the hassle of removing each hood.
6. Give Your Seedlings All the Sunlight They Can Get
Virtually all of the seeds you’ll start indoors require as much sun as possible for optimal growth, regardless of variety. Seedlings that receive inadequate sun will grow weak and spindly and will be much more difficult to transplant to the garden.
Find a location in your house with a large window that faces south or southwest with no obstructions to the sunlight. If necessary, build a structure that allows the seedlings to be as close to the window as possible, but avoid any risk of frost.
If you don’t have access to sufficient sunlight, consider purchasing a grow lamp to provide supplemental light. However, some seeds like delphinium and lupines are just the opposite and require a long period of darkness before they will germinate.
7. Apply a Specially Formulated Fertilizer Once the Seedlings Have Sprouted
Sure, your grandmother may have never fertilized her indoor seedlings, but we now know that regular fertilization ensures healthy and vigorous seedlings come transplanting time.
Use a fertilizer with a high middle number (phosphorus) which encourages the development of an extensive root system to get the plants off to a good start. It is advisable to use a half-strength solution to what is recommended on the label, but do this weekly instead of bi-weekly.
This makes the nutrients available to the young plants more readily than allowing them to experience periods of feast and famine. Come transplanting time, you’ll want to switch over to a fertilizer with a higher nitrogen content.
8. Thin and Transplant Your Seedlings Into Larger Pots
Here’s a tip from the “pros”. Consider starting your seeds in rows of small peat pots, available commercially. Once they’ve germinated and have their first set of true leaves (or reached about 2-3″ in height, depending on the variety of seed), thin each pot to a single healthy seedling.
Then, transplant the pots into larger, deeper growing pots in groups spaced about 2″ apart. For example, you could use the cut bases of cardboard milk containers and plant 4 per. Continue to grow the seedlings in these pots until they’re ready to transplant into the garden.
9. Gradually Acclimatize Your Seedlings Prior to Transplanting
It’s a tough order to just throw seedlings that have grown in the comfort of an indoor environment all their young lives right out into the hostile outdoor garden environment.
It’s best to condition them by gradually introducing them to the outdoor sun, wind, and rain prior to transplanting. Timing is key. Start as early as possible, when day temperatures are guaranteed to be above 7°C (45°F), by leaving them in a sunny sheltered spot outdoors.
Start with just a couple of hours at a time, increasing to all day long over the span of a couple of weeks. Never allow them to experience temperatures below 4°C (39°F) or your efforts may be wasted!
10. Know the Right Time to Transplant Them Into the Garden
If you’ve followed the above tips, you should now have happy, healthy seedlings just itching to get out and grow in your garden. Now more than ever, timing is critical! To determine when it’s safe to plant them out, you must first know the average last spring frost date for your city or town.
Most people will pick a date between one and two weeks following this date for planting. Keep an eye on your long-range weather forecasts and look for trends; consider waiting until there’s no indication of night temperatures falling below 3°C (37°F).