
Some of the best home landscapes just stand apart from the rest, and landscapers and gardeners are always asking me how they can get theirs to look as impressive. There are many elements that contribute to good composition, but many great landscapes are enhanced by the artful design and strategic placement of large-scale landscape elements.
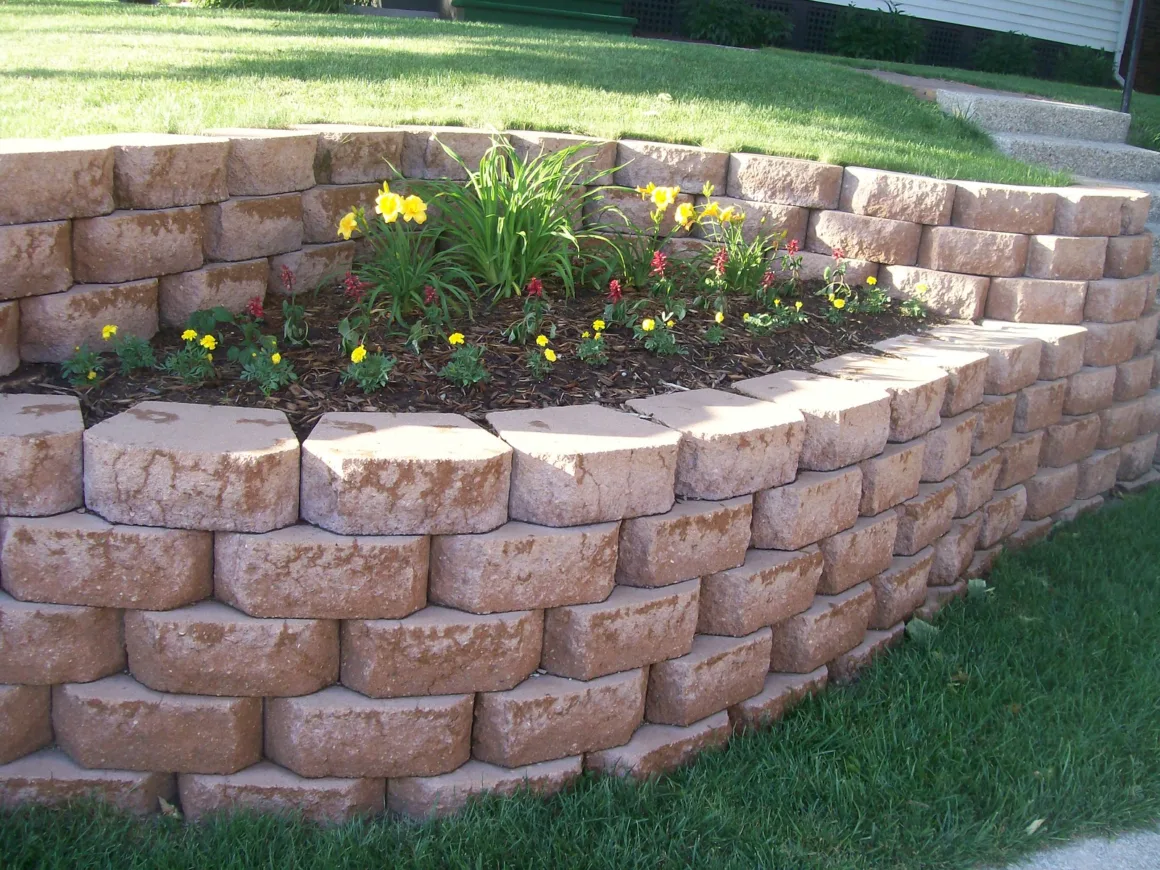
Among the most prominent and showiest of these elements are raised island planters, which are essentially sculptured gardens held aloft on tiered brick or stone islands. The stonework raises the gardens above the grade, making them more prominent, adding topography, and lending the permanence of stone to the landscape.
They’re called island gardens because they are accessible and open on all sides, as opposed to up against a fence or wall. They are beautiful to behold rising out of the lawn, and it might surprise you to learn that they are not that difficult to build, if you know how!
In this two-part “How-To” series, I’m going to walk you through the complete process to design and build your very own raised island planter.
In this first article, we’ll look at the design phase of the process. I’ll get you thinking about your personal design, the materials you will use, and the selection and preparation of your site.
The Basic Design and Plan
The first thing you need to do to get the ball rolling is to plan the project. Planning in this case should result in a physical design, a timeline with your key milestones, and a materials list.
If you don’t start with a detailed plan, you are pretty well doomed to failure right from the start. So, if you’re not into planning, you’re probably best off leaving this entire project to the experts (who, by the way, will be starting off with a plan…).
Let’s start with the design of your planter. You need to decide on a shape, first and foremost. The shape is a fundamental attribute of your overall landscape style, so if your style is formal or linear, you would want to stick with strong lines and sharp angles.
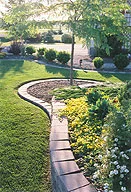
If on the other hand, your landscape theme is highly curved, try using rounded or wavy shapes such as a bean-shaped or S-shaped form.
Remember that the design must also fit into your allotted space, leaving adequate room for yard maintenance on all sides. For my design, I chose a creative shape based on two circles, one slightly smaller than the other, smoothly blended together.
Think about the desired height of your planter. Most retaining walls under 3’ tall can be safely built by do-it-yourselfers, while those above 3’ should be designed by an engineer or landscape architect; an improper design could lead to a collapse and catastrophe! In fact, in many communities, this is a bylaw. If you’re building the planter on sloped or contoured land, this 3’ rule applies to the greatest height anywhere along the planter.
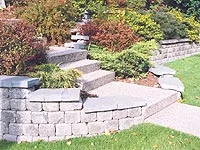
There are ways to get quite creative with your design. You can have more than one level, artistically blending the two levels to make it look like one is sitting on top of the other.
Another interesting variation is to step the wall to different heights; it looks great but requires a little planning to implement and needs special consideration for how to manage drainage and control erosion of the soil as it slopes inside the planter.
For my project, I chose to have two levels, one basically at grade and the other a couple of feet above, comprising the main section of the planter.
One very important note – whatever you do and whatever your particular design preferences, always design the top of your planter to be true level. Never, ever follow the grade of the land – it looks absolutely amateurish when completed! No matter how harsh your slope, or how subtle for that matter, the brick rows of your planter should always be perfectly level.
This looks particularly exquisite when used on steeper slopes, where the bed appears to be emerging from the earth itself!
Once you have a final design in mind, make sure you draw it to scale on a piece of graph paper (or a computer, if you have the software). It absolutely has to be to scale, otherwise, it will be impossible to transfer it to your actual landscape in the next step.
Pick a scale that’s easy to use when you’re out in your yard actually doing the installation; one foot per square would be typical.
Specifying and Acquiring Materials
Next, you need to give some thought to the materials you will be using to build the planter. There are numerous creative ways to build raised planters, with varying degrees of difficulty and skill required. One of the easiest materials to work with is precast retaining wall stones.
These are specially designed and manufactured to lock tightly together and offer a high degree of strength without the use of mortar, and yet give the exterior appearance of true stone.
Because they are relatively easy to work with and come in such a wide variety of colors and textures, that is what I chose to use for this particular island planter, and that’s what I’ll be describing in this article.
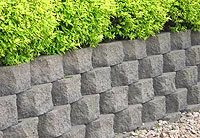
When selecting the bricks, make sure they fit appropriately within your overall landscape composition. If your landscape is formal, you may choose to go with a dark slate or sandstone color with less texture, whereas a contemporary landscape would permit the use of more earthy colors or color blends.
Make sure the fundamental color matches similar elements in your landscape, such as walkways, driveways, or stonework on the house or landscape accessories. For maximum effect, you want the stonework to blend into your landscape rather than stand apart.
To determine how many bricks you’ll need, visit the retailer from whom you will be purchasing the bricks, and get the calculation information from them. They will usually specify an average width, which you can divide into your circumference to get the number of bricks in each row, and then multiply by the number of rows to get the total number of bricks required.
Make sure you calculate how many of these need to be the locking stones and how many need to be capstones (known as “coping stones“) – the top course of stones won’t have the locking ridges on top.
As for the amount of soil to order, you’ll need to do an estimate of the internal volume of your new planter. To do this, simply count the number of squares on your drawing grid that is internal to your planter, and convert them appropriately to square feet.
For example, if each gridline is one foot, then each square is one square foot, etc. Then multiply this by the average height of your retaining wall from the existing ground to the top, and that will give you your total soil volume in cubic feet. That’s the minimum amount you should order.
Finally, for the quantity of base gravel, take a piece of string and run it completely along the outline of your planter on the drawing until the ends meet to estimate the outside circumference. Straighten the string and measure it, using your scale to convert it to actual feet of length.
Multiply this by about 1-1/2 feet in width and either 1/3 foot in depth if your land has a gentle slope or 1/2 foot in depth or even more if it has a much greater slope, and you’ll arrive at the total volume of gravel required in cubic feet. Don’t worry about the details of the gravel; we’ll get to that later in the article.
Put all these items down into a materials list, commonly called a “Bill of Materials“. This will help you to shop around for the best prices and check availability and lead times for the materials you have specified.
If you find that changes are required based on price or availability, this is the time to make them. This is also the right time to generate a basic timeline for your project, from start to finish.
You’ll want to identify key order and delivery dates for your materials and plants, along with the stages of construction. You should also list your own availability, just to be realistic and avoid any scheduling conflicts.
Once you have your bill of materials ready, you can order your materials and schedule them for delivery. Unless you own a very large truck, you’ll need to have at least the bricks and the soil delivered, and probably the base course of gravel as well.
Read Also:
Selecting and Preparing the Site
Take your design and transfer it to the location in your yard where you will be installing the raised planter. To do this, identify and mark a central spot on your plan with a known set of coordinates from a fixed point in your landscape (for example from your house or a nearby tree). Find this spot in your yard, and then use it as a common point from which to reference the key markers of your design.
Using wooden stakes, mark off the basic outline of your plan, using a tape measure to locate their position relative to your reference point. I would suggest taking off every 2 or 3 feet along straight edges, with the stakes getting closer and closer together as the curves get tighter.
You’ll see quite easily when and where you need to put more stakes just by looking for the shape of your final design emerging as you put in the stakes.
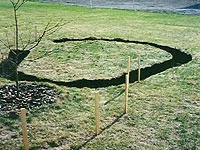
At this point I usually like to tie off the outside of the markers with mason’s string, to give me a visual feel for the actual size and shape of the planter before I’ve started digging. If something seems awry or doesn’t look right, this is a great time to go back and recheck your design. The string also helps guide your excavation, but it is not absolutely necessary for those with a “good eye”.
If you’re developing a new landscape with bare earth, then you can skip this next step. However, if you are building this planter into an existing landscape, chances are you will be excavating either lawn or plants in a part of the garden.
If you’re working in an existing garden, remove the shrubs and flowers completely; most perennials can probably be saved and relocated by putting them in pots and watering them very well until they’re ready to be replanted.
If you’re working from an existing lawn, you need to be aware that grass is quite persistent, and should really be eliminated before you start construction.
If your planter will have at least one foot of soil added above grade, I would recommend that you first apply glyphosate such as RoundUp two weeks in advance to completely kill the grass in the area where the planter will go, and then the soil can be dumped right on top without any further preparation.
If it’s a shallower planter, you are best to actually remove the surface layer of sod and roots first. Take it from me, you don’t want to be fighting with grass in your new garden.
That’s it for the design and preparation phase of the project. In the next part, we’ll get the shovels into the ground as we go into the installation phase.
Click here to go to the second part of this series.