
And now for the second and final part of this home landscaper’s guide to building a raised island planter for your yard, that will be the envy of the neighborhood. In the opening part of the series, I spent time on the design phase of your new garden showpiece, because as a devoted Northscaper, you appreciate the importance of planning for a successful outcome.
In this part, we hit the big payoff as you get to carry your design out into the yard, put your shovel into the earth and make your visions come to life!
Previously, I told you how to create your design, how to specify and acquire the bricks, soil, and gravel for your project, and how to select and prepare the site. To reference the info sheet or just to refresh your memory, you can click here to view Part 1 of this two-part series.
Now that the design process is complete, it’s time to begin the physical installation process. Get your shovels and your tape measures and let’s go out into your yard!
Building the Base
In order to build up your raised planter, we have to start by going down. First, you’ll need to dig a trench below grade where the foundation of the retaining wall will be installed. Regardless of whether or not you have an existing lawn or garden, you need to dig a border around the marked-off area and excavate it.
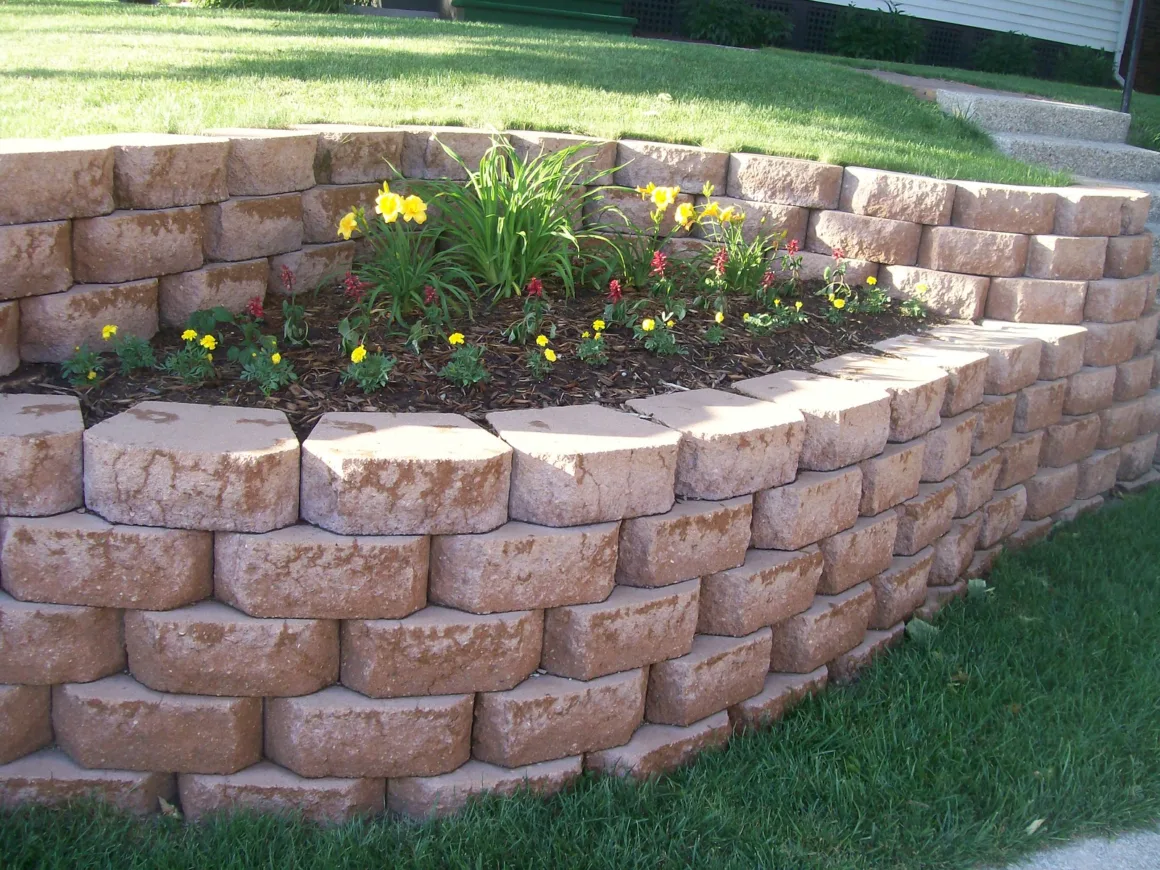
Here’s how it works, so pay close attention. The retaining wall bricks need a solid base on which to sit. So, the first layer of bricks (the “starting course“) should sit with their tops no more than 1” above grade at the very lowest point of the planter.
If you have a sharp slope, a few of the first bricks that start a course should be completely buried and out of view; this is absolutely necessary to ensure proper stability. Once you get one or two bricks deep and buried into a slope, you can step up to the next level, but in no case should the top of any brick in the lowest course of a vertical segment ever be more than 1″ above the ground.
The starting course itself needs to have a firm foundation, so before we even lay this, we will first give it a solid base to sit on. This is important not only to give it adequate strength in a vertical sense but to keep it from shifting side to side under any circumstances.
This base must drain water and keep it away from the bricks and must be able to accommodate any shifting of the underlying soil due to frost. I recommend using what is known as “3/4-down” crushed rock. This is a type of gravel consisting of stones with a diameter of 3/4” or less, including fine particles which help to cement the base and give it strength.
When you take all of this into account, you can now calculate the depth of your starting trench. It should sit below grade to at least the depth of the base course (a minimum of 4″) plus at least the height of the starting course of bricks less than one inch.
Remember, too, that every course of the stonework must be true level, so that means both the starting course and the gravel base itself.
All things considered, unless you have a very flat piece of land as your starting point, you’re best off calculating a minimum depth and then physically excavating as required to achieve this minimum depth across the entire trench while maintaining true level.
I know it sounds tough, but take it from me, this is probably the most important step in the entire installation process! You know what they say about a house that’s built on a shaky foundation.
As for the width of the trench, that depends on the width of the retaining wall bricks. To calculate this excavation width, take the width of the bricks, and then add about 4″ space on the outside, and 4-6″ space on the inside. The trench should be at least this wide.
As for the installation process itself, start by digging the trench to your prescribed dimensions. If you’re starting from an existing lawn, I always like to use a lawn edger to give a sharp border. Simply follow along the outside edges of the markers and string, and cut nice and deep to loosen the sod.
First, lift the sod, then dig the undersoil until you achieve your desired depth. Keep the trench as square as possible, and remove all the soil including any chunks that might fall in.
Once the trench has been dug, fill in the base course of 3/4-down gravel to a minimum depth of 4″, keeping the top of the gravel at least the height of 1 brick below grade less than one inch. An easy way to measure this is to lay a flat stake across both sides of the trench and measure the gap between it and the gravel below.
As you add the gravel, tamp it down vigorously with a brick or the blunt edge of a 2 x 4. It needs to be as firm and solid as you can get it. Try to keep the surface as flat as possible and as level as possible, because the starting course of bricks will be sitting directly on top of this gravel.
Brickwork
Now it’s time to lay the bricks, starting with the base course. If you did the previous step properly and with care, this next step should be a breeze. Start by setting one brick on the base gravel. Have a level handy, and check the brick for level in both directions; with the trench, and across it.
It must be perfectly level, or the rest of the entire planter will be out! Use the blunt end of your 2 x 4 to tamp it down into the gravel base so that it is sitting absolutely firmly. Make sure that it doesn’t rock or sway; it needs to be seated as firmly as possible.
Then, use the initial brick as a starting point to lay subsequent bricks next to it, going around the trench until you meet back at the original brick, leveling each in the process. Use the right sides of the bricks to round the curves smoothly.
If all went well, the bricks should each be level and should meet cleanly back at the starting brick. If you have tier transitions in the starting course due to a slope, make sure that the transitions are clean and level. Remember, everything must be level!
Once the starting course is installed, you need to go around and fill in the outside and inside gaps that remain on the lawn and to the interior of the planter. Both should be filled to grade level with 3/4-down crushed rock which has been firmly tamped to ensure that the bricks do not have any side-to-side motion at all.
I like to leave about 1/2″ of space on the top of the outside course and finish it off with a little soil. That way, the lawn will eventually grow into this soil and fill in the gap right up to the retaining wall bricks.
Now that you have a clean and level starting course sitting on a firm foundation, the rest goes like clockwork. Simply lay the next courses one at a time, checking occasionally for level. The bricks are designed to be offset by half a brick when they interlock, to give maximum rigidity and strength. If you did everything properly in the initial phase, this part should go very quickly.
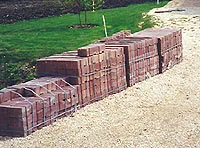
All of the courses building upwards will use the stones with the interlocking tops, until the very last course, which is known as the cap. The bricks that go on the very topmost course are known as “coping stones”, and don’t have the locking ridge on top.
It is strongly recommended that you use an adhesive to secure this top layer of stones to the course beneath, as they have no pressure from on top with which to hold them to the lower courses.
If you did everything right, the top course should end up being perfectly level along with all the other courses, and the planter should really be looking fabulous.
Soil, Plant Selection, and Planting
Finally, the last steps! You will start by adding your soil to the empty raised planter. If the planter is of a significant height, it could be somewhat of a challenge to get soil inside, so I find it helpful to use a strong sheet of plywood set against the ground up to the top of the planter’s edge, onto which I roll my wheelbarrow to dump the soil.
Just bring in load after load until the planter is full, making sure to occasionally pack down the soil with your bare feet to avoid settling problems later on.

Use a rake to level the top of the soil. I would suggest bringing the soil to exactly the height of the planter’s top edge, as it will usually settle a half to a full inch, allowing room for a mulch to be added later on.
If you have the luxury and the patience, wait for a good rainfall to soak the soil and settle it, and then plant your selected plants. Otherwise, you can douse it with a garden hose, making sure that the water gets good and deep.
When choosing plants for a raised planter, keep in mind that it will generally be somewhat more exposed to the elements than its surroundings, particularly in winter, by virtue of its height.
So, you’re best to choose plants that are relatively hardy for your zone, plants you are confident will tolerate this level of exposure. As a rule, growing plants along the edges will be more challenging than in the center of the planter, as the edges are colder and will tend to freeze in winter.
The act of planting itself is very simple since you likely have fresh quality garden soil in the planter. Set the plants in at their original growing depth, and give them lots of water to start off with. Because the planter is raised, it will drain very efficiently and thus may need to be watered a little more often than your other gardens.
And there you have it – you are now the proud owner of a brand new and most impressive raised island planter! Congratulations, I knew you could do it!