Table of Contents Show
Upgrading your home’s lighting doesn’t have to cost a fortune or require professional help. Installing dimmer switches is a DIY-friendly project that can completely transform the ambiance of your space. Alongside aesthetic improvements, dimmer switches save energy and extend bulb life, making them not just a design choice but a practical one too.
If you’re hesitant about taking on an electrical project, don’t worry. With the right preparation and tools, you can confidently install dimmer switches in just a few steps.
Benefits of Installing Dimmer Switches
Why bother with dimmer switches when standard light switches work fine? The answer lies in the versatility and functionality they bring to your home.
Energy Savings
Lower energy consumption is one of the biggest advantages of dimmer switches. By reducing the intensity at which your lights operate, dimmer switches decrease electricity usage and help lower your utility bills. This makes them especially beneficial for eco-conscious homeowners.
For more details on the electrical cost-saving benefits, check out this guide from Home Depot.
Customizable Lighting
Create the perfect ambiance for any occasion with adjustable lighting. Whether you’re hosting a cozy dinner or need better lighting for reading, dimmer switches let you control the brightness to suit your needs. It’s like having multiple lighting settings in one.
Increased Bulb Lifespan
Since dimmed lights function at a lower power level, they put less strain on bulbs, extending their lifespan. This means fewer trips to the store for replacements and long-term savings.
RELATED: Appliance Installation Safety: Tips to Keep You and Your Home Secure
Tools and Materials Needed for Dimmer Switch Installation
Before you dive in, make sure you have everything necessary to ensure a smooth installation.
Basic Tools
- Flathead and Phillips screwdrivers
- Voltage tester
- Wire connectors
- Electrical tape
You don’t need any specialized tools, but a voltage tester is a must to ensure safety.
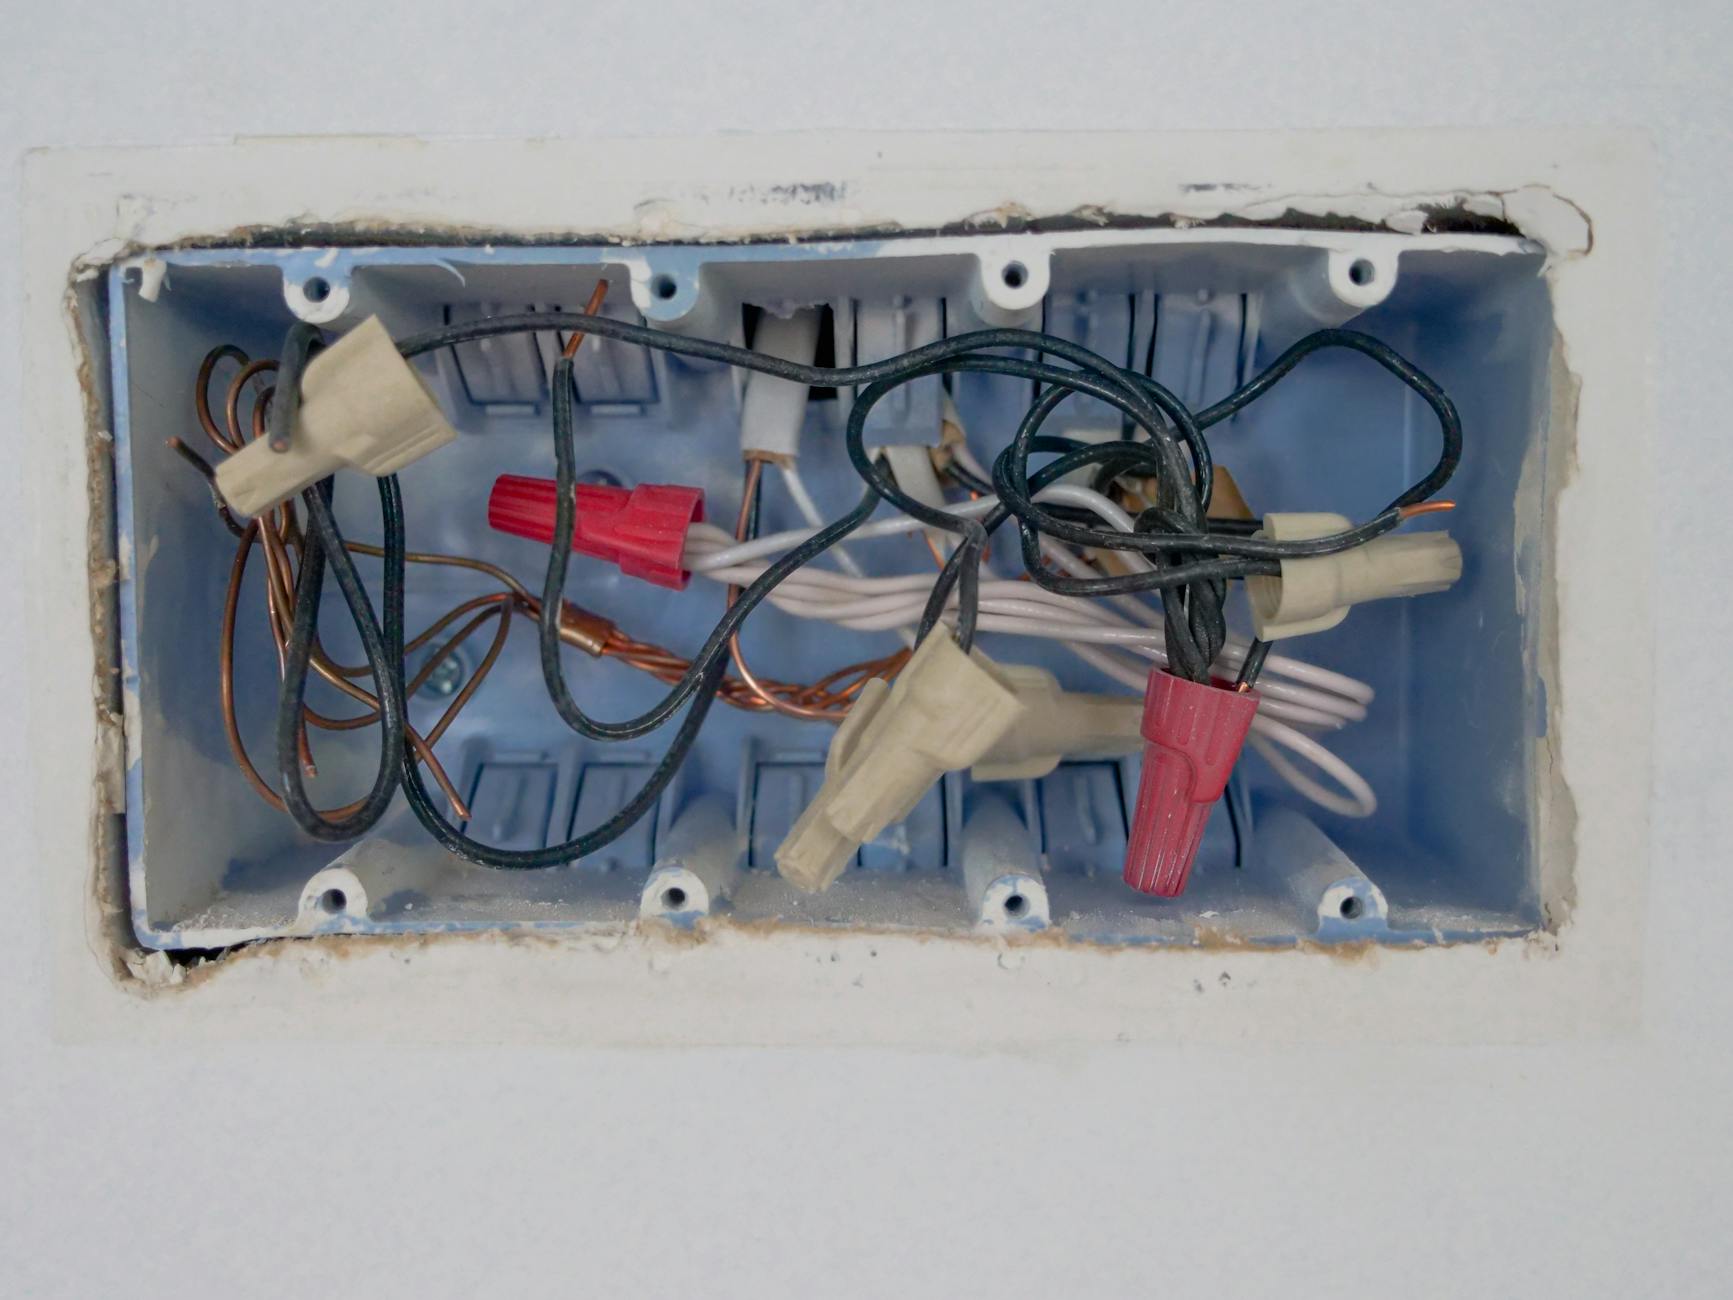
Photo by Kindel Media
Dimmer Switch Compatibility
Not all dimmer switches are created equal. You need a model compatible with your light bulbs (LED, CFL, or incandescent) and your home’s wiring setup (single-pole or three-way). Check the packaging or consult the manufacturer’s guide to ensure compatibility.
Learn more about choosing the right dimmer switch by visiting Lowe’s expert guide.
RELATED: Conduit Installation 101: How to Safely Wire Up Your Garage Lighting and Receptacles
Step-by-Step Guide to Installing Dimmer Switches
Follow these steps to safely and effectively install a dimmer switch.
1. Turn Off the Power
Always start by turning off the power at your circuit breaker. Double-check with a voltage tester to make sure no electricity is running to the switch. Safety should never be compromised.
2. Remove the Existing Switch
Unscrew the cover plate and remove the mounting screws to pull out the existing switch. Carefully disconnect the wires attached to the old switch and take note of how they’re connected.
3. Connect the Dimmer Switch
Using the provided wiring diagram, match the wires on the dimmer switch to the ones in your wall. Securely twist them together with wire connectors. Generally, the black wire is for the load, the white wire is neutral, and the green or copper wire is for grounding.
4. Reinstall the Faceplate and Test
Push the connected wires back into the wall box, secure the dimmer switch with screws, and mount the faceplate. Restore power and test the switch. You should be able to adjust the light’s brightness with ease.
For a visual guide, explore this detailed tutorial at HGTV.
RELATED: Avoid These Common Mistakes When Installing Appliances
Common Mistakes to Avoid
Even simple DIY tasks can go awry without proper attention to detail. Here’s what to watch out for.
Failure to Cut Power
This can be dangerous and is a mistake no one should make. Always double-check that the power is off before starting.
Incompatible Components
Mixing dimmer switches with non-compatible bulbs or mismatched wiring can cause flickering and may damage your lights.
Loose Wiring
Improperly secured wires could lead to overheating or cause your dimmer switch to malfunction. Make sure connections are tight and secure.
RELATED: Can I Install Appliances Myself or Do I Need Professional Help?
Conclusion
Installing dimmer switches is easier than most people think, and it’s a project that offers aesthetic, practical, and financial benefits. You’ll gain the satisfaction of improving your home while saving on power and maintenance costs. If you encounter a more complex electrical setup or feel uncertain at any step, consider consulting a professional electrician.
By taking on this DIY project, you’re one step closer to making your home smarter, more energy-efficient, and tailored to your needs. Happy installing!
FAQs
Why should I consider installing dimmer switches in my home?
Dimmer switches enhance the ambiance of your space, allowing you to customize lighting for different occasions. They also save energy, lower utility bills, and extend the lifespan of your bulbs. It’s a practical and aesthetic upgrade!
What tools do I need to install a dimmer switch?
You’ll need basic tools like flat-head and Phillips screwdrivers, a voltage tester, wire connectors, and electrical tape. A voltage tester is crucial to ensure your safety while working with electricity.
How do I ensure the dimmer switch I choose is compatible with my existing setup?
Check the packaging or consult the manufacturer’s guide to ensure compatibility with your light bulbs (LED, CFL, or incandescent) and your home’s wiring setup (single-pole or three-way).
What are the steps to install a dimmer switch safely?
Start by turning off the power at the circuit breaker. Remove the existing switch, connect the new dimmer switch according to the wiring diagram, and then reinstall the faceplate. Finally, restore power and test the switch.
What common mistakes should I avoid when installing a dimmer switch?
Be sure to always cut the power before starting, avoid using incompatible components, and ensure all wiring connections are tight and secure to prevent overheating or malfunctions.
What should I do if I encounter a complex electrical setup while installing a dimmer switch?
If you feel uncertain or face a complicated wiring situation, it’s best to consult a professional electrician to ensure safety and proper installation.