Table of Contents Show
Introduction
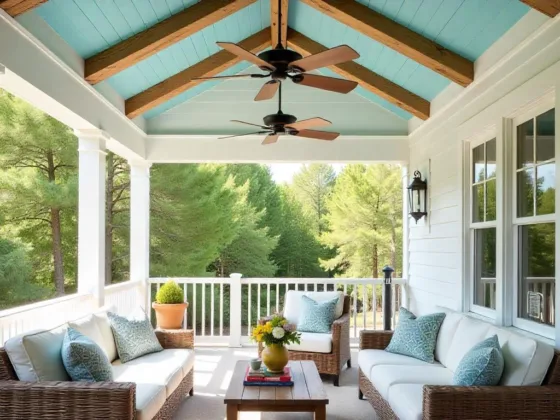
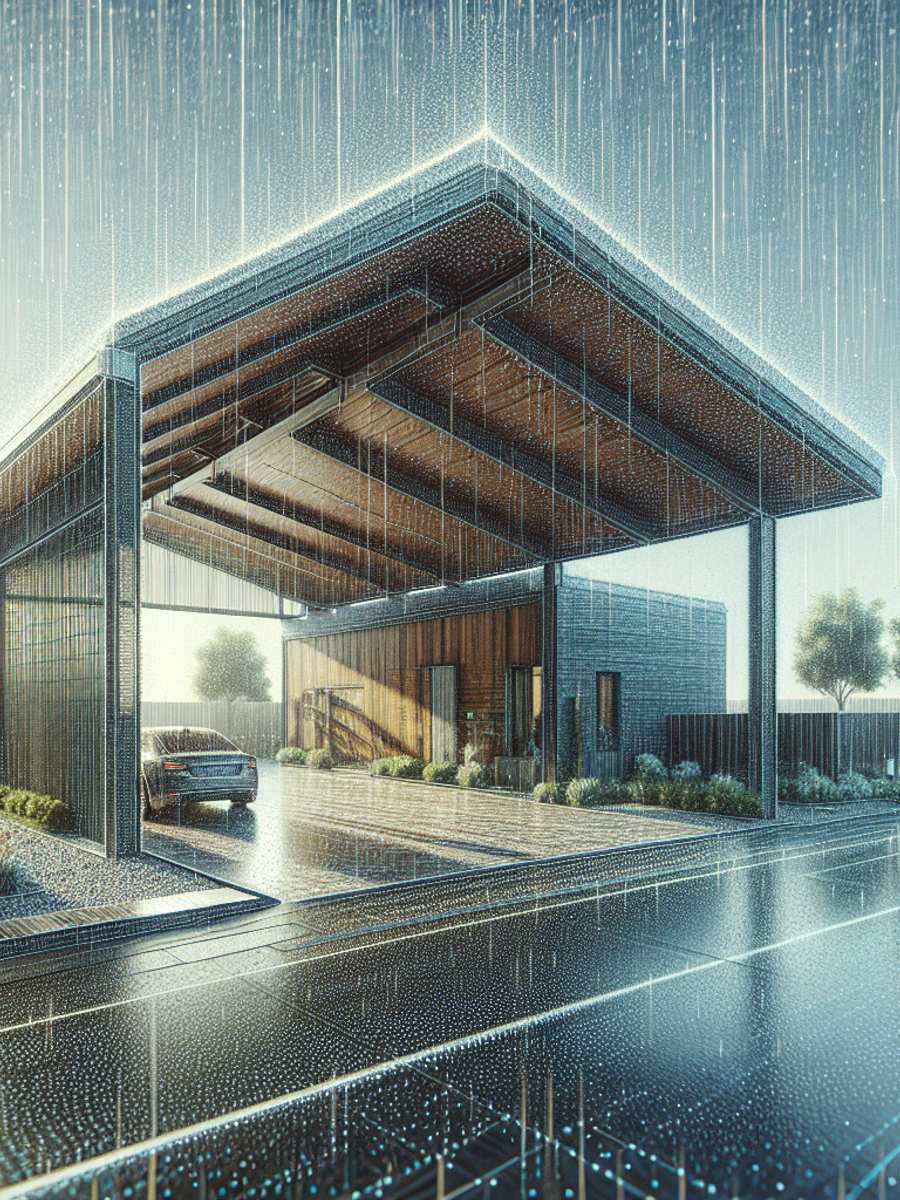
A carport is a covered structure designed to offer limited vehicle protection, primarily from the elements. Unlike a garage, it usually lacks walls, making it a more open and accessible option. Building a carport attached to your house provides several advantages:
- Convenient vehicle storage close to your home
- Protection from weather elements like rain, snow, and sun
- Enhanced property value through added functionality and appeal
This guide will walk you through the process of attaching a carport to your house without causing any damage to the exterior. Whether you want to protect your car from harsh weather or add additional outdoor covered space, these step-by-step instructions will help you build your dream carport effortlessly.
Looking for some inspiration on how to organize your newly attached carport? Check out these DIY garage storage organization ideas that can easily be adapted for use in a carport setting. With proper storage solutions in place, you can make the most out of your new space while keeping everything neat and tidy.
Ready to get started? Follow our comprehensive guide and transform your home with a beautifully attached carport.
Section 1: Planning and Preparation
Thorough planning is crucial before beginning the construction process for a carport attached to your house. It ensures that you adhere to local regulations, gather necessary materials, and avoid potential pitfalls during construction.
Subsection 1.1: Checking Local Building Codes and Securing Permits
Researching and complying with relevant building regulations is essential:
Local Building Codes:
- Start by visiting your local municipal office or website to understand the building codes that apply to carport construction in your area. Common requirements include setback distances from property lines, height restrictions, and structural specifications. This knowledge will help you avoid any issues when constructing your carport.
Permits and Approvals:
- Obtain the necessary permits or approvals from local authorities. The application process typically involves submitting detailed plans of your proposed carport, including dimensions, materials, and location relative to your house. Processing times can vary, so plan accordingly. Familiarize yourself with the required permits by referring to resources like this guide on securing permits for construction projects.
Subsection 1.2: Gathering Materials and Tools
A comprehensive list of materials and tools will streamline the construction process:
Materials Needed
Pressure-Treated Lumber:
- Opt for pressure-treated lumber for durability against moisture and pests. This DIY Woodworking guide provides insights into working with different types of wood.
Recommended Sizes:
- Posts: 4×4 or 6×6
- Beams: 2×6 or 2×8
- Rafters: 2×4 or 2×6
Concrete Mix:
- For securing post foundations.
Roofing Material:
- Options include corrugated metal sheets or asphalt shingles.
Fasteners:
- Galvanized nails/screws
- Anchor brackets
- Lag screws
Essential Tools
- Circular Saw: Necessary for cutting lumber to size.
- Miter Saw: Helps achieve precise angled cuts for rafters and braces.
- Hammer Drill: Useful for drilling into concrete when installing anchor brackets.
- Measuring Tape: Ensures accurate measurement of all components.
- Level: Guarantees that all posts and beams are plumb and level.
- Post Hole Digger: For digging holes for the foundation posts.
Thorough preparation by checking building codes, securing permits, gathering materials, and organizing tools ensures a smooth construction process. Additionally, while planning your carport project, you may also want to consider incorporating some beautiful plants for balcony gardens into the design to enhance its aesthetic appeal.
Section 2: Anchoring the Structure to the House
Attaching a carport securely to your house requires careful planning and precise execution. This section breaks down the key steps involved in anchoring the structure.
Subsection 2.1: Determining Post Locations and Digging Holes
Properly positioning the support posts is crucial for stability and alignment.
Post Locations
- Measure the height and clearance needed for your carport.
- Mark the points where the posts will be placed, ensuring they are evenly spaced along the house’s existing structure. Consider any windows, doors, or other obstacles that might affect placement.
Digging Holes
- Use a post-hole digger or auger to dig foundation holes at each marked location.
- Ensure each hole is deep enough to support the weight of the carport, typically around 2-3 feet deep depending on local building codes.
- Check the alignment of each hole to ensure they are straight and level.
Subsection 2.2: Securing Posts and Attaching Support Beams to the House
With your post locations determined and foundation holes dug, proceed to secure the posts and attach support beams.
Anchoring Posts
- Concrete Surfaces: Use anchor brackets designed for concrete. Place a bracket in each hole, ensuring it sits level at the bottom. Pour concrete into each hole, securing the brackets as it sets.
- Wood Surfaces: Use lag screws for wood surfaces. Position each post in its respective hole, then drill pilot holes for lag screws through both post and surface.
Attaching Support Beams
- Ledger Boards: A common method involves attaching a ledger board directly to the house facade at the desired height. Ensure it is level before securing it with heavy-duty bolts.
- Metal Brackets: Alternatively, use metal brackets to secure beams directly to the house. This method provides additional flexibility in positioning.
To ensure the structural integrity of your carport, it’s crucial to follow proper framing techniques. You can refer to the Framing Installation Guide for detailed instructions on this aspect.
The next step involves constructing the roof framework, providing both structural stability and weather protection for your carport.
For those interested in expanding their garage space, a garage conversion guide could be a valuable resource. Additionally, if your carport features a wooden deck, it’s important to know how to properly clean and care for it. You can find detailed instructions on this in our article on how to clean and care for a wooden deck.
If you’re looking for some insights from experienced DIYers who have built decks or small roofs without posts, you can check out discussions on platforms like Reddit and Garage Journal Forum. These platforms often provide valuable tips and experiences that might be relevant to your specific project.
Section 3: Constructing the Carport Roof
The roof is a crucial component of your carport, providing both structural stability and essential weather protection. This section will cover the installation of support beams, knee braces, rafters, and roofing sheets.
Subsection 3.1: Installing Support Beams, Braces, and Rafters
Setting up the main framework of the roof involves several key steps:
Setting Up Support Beams
- Use sturdy beams to form the primary structure.
- Ensure proper spacing and alignment.
- Secure beams to the posts using metal brackets or lag screws.
Installing Knee Braces
- Add knee braces between posts and beams for extra support.
- Use heavy-duty bolts or screws to secure them in place.
- Ensure that they are evenly spaced for balanced support.
Rafter Installation
- Measure and cut rafters to fit the span of your carport.
- Secure rafters to the support beams using metal connectors or hurricane ties.
- Check alignment and spacing to maintain consistency across the roof.
Subsection 3.2: Adding Roofing Sheets or Panels
Once the framework is in place, covering it with your chosen roofing material is necessary:
Choosing Roofing Materials
- Options include corrugated metal sheets, asphalt shingles, or polycarbonate panels.
- Consider durability, weather resistance, and aesthetics when selecting materials.
Installation Process
- Start from one end of the carport and work your way across.
- Overlap roofing sheets slightly to prevent leaks.
Securing Roofing Sheets
- Use appropriate fasteners like screws or nails designed for your chosen material.
- Ensure each sheet is securely fastened to both rafters and support beams.
Sealing and Finishing Touches
- Apply sealant along seams and edges to prevent water ingress.
- Inspect all fastenings to ensure they are tight and secure.
By following these steps, you will create a durable and weather-resistant carport roof that can withstand various environmental conditions while providing optimal protection for your vehicle.
If you are considering other outdoor structures such as pergolas or have concerns about protecting wooden components in your carport like the support beams from termite damage, you may find it helpful to explore preventative measures outlined in this article on protecting your wooden deck from termites.
Section 4: Enhancements and Finishing Touches
Incorporating additional features into your carport design can significantly enhance both its aesthetics and functionality. These enhancements not only add visual appeal but also improve the overall utility of the structure.
Subsection 4.1: Installing Lattice Panels for Enclosure

Adding lattice panels to the sides of your carport provides a sense of enclosure and privacy, while still allowing for proper ventilation. This addition can be particularly beneficial if you use your carport for purposes other than just vehicle storage, such as a shaded outdoor area.
Benefits of Lattice Panels:
- Privacy: Creates a semi-enclosed space that offers privacy from neighbors.
- Ventilation: Maintains airflow, preventing heat buildup.
- Aesthetic Appeal: Adds a decorative element to the carport design.
Step-by-Step Instructions for Installing Lattice Panels:
Measure and Cut Panels:
- Measure the dimensions of the sides where you plan to install the panels.
- Cut the lattice panels to size using a circular saw.
Prepare Posts and Supports:
- Install vertical support posts at regular intervals along the sides of the carport.
- Ensure posts are securely anchored to the ground or existing structure.
Attach Lattice Panels:
- Position the lattice panels against the support posts.
- Securely attach panels using exterior-grade screws or nails, ensuring they are evenly spaced.
Add Trim (Optional):
- For a polished look, add trim around the edges of the lattice panels.
Use pressure-treated lumber for durability, which you can learn more about in this FAQs about pressure-treated lumber resource.
Subsection 4.2: Applying Finishes to the Carport Structure
Protecting exposed wood surfaces with a durable finish is essential for maintaining long-lasting beauty and resistance to weathering. Choosing between exterior paint or stain depends on your desired aesthetic and maintenance preferences.
Importance of Finishing:
- Protection: Shields wood from moisture, UV rays, and insects.
- Durability: Extends the lifespan of your carport by preventing decay.
- Aesthetics: Enhances visual appeal with a variety of color options.
Preparation Techniques:
Clean Surfaces:
- Remove any dirt, dust, or debris from all wood surfaces.
- Use a mild detergent and water solution if needed.
Sand Wood (If Necessary):
- Sand rough areas to create a smooth surface for finishing.
- Use medium-grit sandpaper for an even texture.
Apply Primer (For Paint Only):
- If painting, apply an exterior primer to ensure proper adhesion.
- Allow the primer to dry completely before painting.
Application Techniques:
Choose Your Finish:
- Select either an exterior-grade paint or stain designed for pressure-treated lumber.
Apply Finish Evenly:
- Use a brush, roller, or sprayer to apply the finish in long, even strokes, following the wood grain.
- Work in small sections to ensure thorough coverage.
Allow Sufficient Drying Time:
- Follow the manufacturer’s instructions for drying time between coats.
- Apply additional coats as necessary for optimal protection.
Maintenance:
- Regularly inspect the carport for any signs of wear or damage.
- Clean the surface annually with a mild detergent and water solution to remove dirt and grime.
- If the finish begins to fade or deteriorate, consider reapplying a fresh coat to maintain protection and aesthetics.
Cleaning:
- Periodically clean the surface with a mild detergent and water solution to remove dirt or stains.
- Avoid using harsh chemicals or abrasive cleaners that can damage the finish.
Following these finishing and maintenance steps, you can ensure that your carport remains durable, visually appealing, and protected from the elements for years to come.
Conclusion
Attaching a carport to a house involves several critical steps:
- Planning and Preparation: Start with thorough planning. Check local building codes, secure necessary permits, and gather all required materials and tools.
- Anchoring the Structure: Determine post locations, dig holes, and use anchor brackets or lag screws to secure posts and support beams.
- Constructing the Carport Roof: Install support beams, braces, rafters, and cover with roofing sheets or panels using best installation practices.
- Enhancements and Finishing Touches: Add lattice panels for enclosure and protect wood surfaces with finishes like exterior paint or stain.
Meticulous planning and adherence to best construction practices are essential. By following these guidelines on how to attach a carport to a house, you can create a functional space that not only protects your vehicle but also enhances your home’s value.
Take action now to build your dream carport. Invest in quality materials, follow the steps rigorously, and enjoy the added convenience and protection.
FAQs (Frequently Asked Questions)
What is the first step in attaching a carport to a house?
Thorough planning is crucial before beginning the construction of a carport attached to a house. This includes checking local building codes and securing permits, as well as gathering the necessary materials and tools.
What type of lumber should be used for the carport construction?
Pressure-treated lumber is recommended for the construction of a carport, as it offers enhanced durability and resistance to decay, making it suitable for outdoor structures.
How should the support posts be anchored to the ground?
Support posts can be anchored by determining their locations, measuring the height and clearance needed for the carport, digging foundation holes at each post location, and then securing the posts with concrete or anchor brackets designed for concrete surfaces.
What are the key components involved in constructing the carport roof?
The key components involved in constructing the carport roof include installing support beams, braces, and rafters to set up the main framework, as well as adding roofing sheets or panels once the framework is in place.
What additional features can be added to enhance the carport design?
Lattice panels can be installed for enclosure, providing benefits such as privacy and aesthetic appeal. They can be installed by measuring and cutting panels to fit the sides of the carport structure.
Why is applying finishes to the carport structure important?
Applying finishes to the carport structure is important for protection, as it shields wood from moisture, UV rays, and insects. It also helps maintain the overall appearance of the structure.