Table of Contents Show
The DIY kitchen sink plumbing involves following basic instructions safely and carrying out the different actions in order. The very first action is that all hot and cold isolating valves are shut and the pipework drained before the project is started.
Making sure you have all the required materials and tools to hand is another important measure. Also, fitting the sink drain, overflow, and taps to the sink before it is inserted into the worktop is easier than trying to fit them after the sink is installed.
These actions are all possible to the average DIY person in carrying out DIY kitchen sink plumbing.
DIY Kitchen Sink Plumbing- Instructions
The plumbing of a kitchen sink involves connections to the hot and cold water supply taps and the home’s water drainage system.
This can be carried out by the average DIY person provided a few basic precautions are taken provided connecting the pipes and safety are observed.
Introduction to DIY Steps to Kitchen Plumbing
DIY steps to kitchen plumbing include the plumbing of a kitchen sink. This is necessary when doing a kitchen makeover or when the sink has become obsolete. Either way, the project can be carried out easily using modern plumbing materials and hand tools.
This is a home DIY article in which we look at the plumbing of a kitchen sink, highlighting any problems and ensuring all safety precautions are observed.
We begin with the fitting of the new sink.
Fitting of a New Kitchen Sink
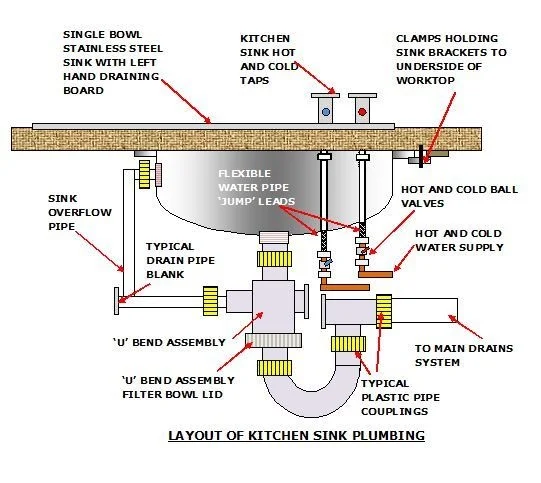
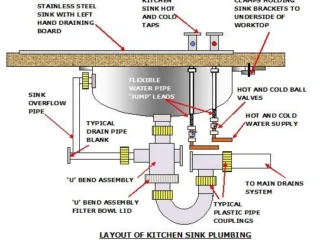
Before starting, the tools and equipment required should be at hand (see below). Also, use the diagram below as a visual guide for this section.
Shut off the main cold water inlet valve, the supply from the hot tank, and local hot and cold water supply valves, then drain the pipes.
The sink drains and taps are fitted to the sink before it is installed into the counter-top by laying the sink on its side (putting an old towel below it will inhibit the counter-top from getting scratched.)
Split the sink drain connection unit, insert the rubber seal and push the top part through the hole in the bottom of the drain, then fit the other rubber seal against the underside of the sink and tighten the assembled unit.
The overflow unit is fitted in the same manner.
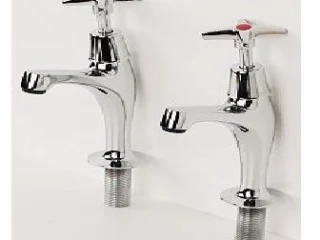
The taps come complete with a threaded supply pipe, mounting washers, and locknuts. There are two holes on the sink side by side, into which the taps are inserted.
Unscrew the locknut from the screwed section. Insert a washer onto it, then push this section through one of the holes in the sink (If possible try to have the hot tap vertically above the existing hot water supply pipe). Screw on the locking nut and tighten it against the underside of the sink, keeping the tap square with the sink edge. Repeat this on the cold water tap.
Before fitting the sink, spread a liberal amount of waterproof silicon sealant around the area where the sink sits on the countertop.
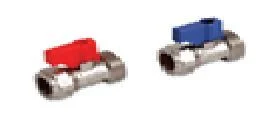
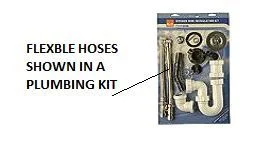
Insert the sink and tighten the clamps onto the underside of the countertop ensuring its edge is parallel to the countertop edge. Wipe off the excess silicon. Fit the flexible hoses making sure the hot supply hose is fitted between the hot tap and the valve with the red handle on the existing hot supply pipe. Repeat this procedure for the cold water supply.
Replace the electric earth bonding copper wires; these are thick copper cables with a green insulation cover. Clamp them back in place by their bared ends onto the copper/steel water pipes.
Using a new U-bend assembly, reconnect the drain system between the sink drain and outside drain pipe, modifying with spare pipe and couplings if required. Hand-tight is sufficient for these couplings and fittings but make sure rubber ‘O’ rings are fitted to couplings.
Connect the overflow pipe to the U-bend drain assembly, checking any unused connections are capped off.
Tools and Materials Required
Tools
- ½, 5/8, and ¾ inch open-ended spanners
- Hacksaw or general purpose saw
Materials
- Tube of clear waterproof silicon sealant
- U-bend assembly for drain system
- Two U bend assembly blanks
- Two couplings and a 3’ length of the drain pipe
- Pair of jumper cables able to fit in between the sink taps and hot and cold supply valves
Checking the installation for Operation and Water-tightness
The following steps in the sequence described should be used to check the system piping and drains:
- Open the sink hot and cold taps. Open the main hot and cold water supply, then open local hot and cold valves.
- Check the water flow from taps and pipework for any leaks.
- Insert the drain plug and fill up the sink with water until it reaches the sink overflow.
- Check that overflow is working and there are no leaks either from the connecting hose or its connection to the sink or U-bend drain assembly unit.
- Remove the sink plug and inspect the drain system for leaks between the sink drain, through the U-bend assembly, and into the outside drain connection pipes.
Storage Cupboard under the Sink
If there is a storage cupboard under the sink, you may have to adjust the height of the shelves or cut part of them away to accommodate for the water and drain pipework if they are different than the original runs.
Summary
There are certain DIY steps to kitchen plumbing when fitting a sink that must be carried out in order to complete the project safely and efficiently while giving it a professional finish.
I have fitted several new sinks and have found the most valuable asset to the plumbing was the use of flexible piping jump-leads that come complete with the correct couplings for most hot and cold supply piping and valves. These leads, along with the use of color-coded valves with compression couplings negate the use of soldering joints.
Safety is very important and involves the isolation of local and main hot and cold water supplies and ensuring that the sink (if metal) is electrically bonded to earth, through the water supply pipes.
Once the project is complete, the water supply, overflow, and drain system must be tested for leaks.
