Table of Contents Show
Make-over Your Child’s Room
I enjoy the likes of HGTV with all of the designs and home makeovers. The transformations are often awe-inspiring leaving little to desired, except that I don’t have a budget to fit Vern Yip or Candace Olson’s style nor do I have bedrooms the size of a large living room.
But, I have a nice home with normal rooms, plus a dash of creativity and perfectionism. Although spending money makes me nervous, I want our rooms to look complete and satisfying.
When my oldest daughter, then two (now four), would soon need to be transitioned into a new bedroom to make room for our second daughter on the way, we really had no furniture or bedding. I was starting from scratch. I wanted the room to be bright and happy and to fit her young age while at the same time being able to “grow” with her.
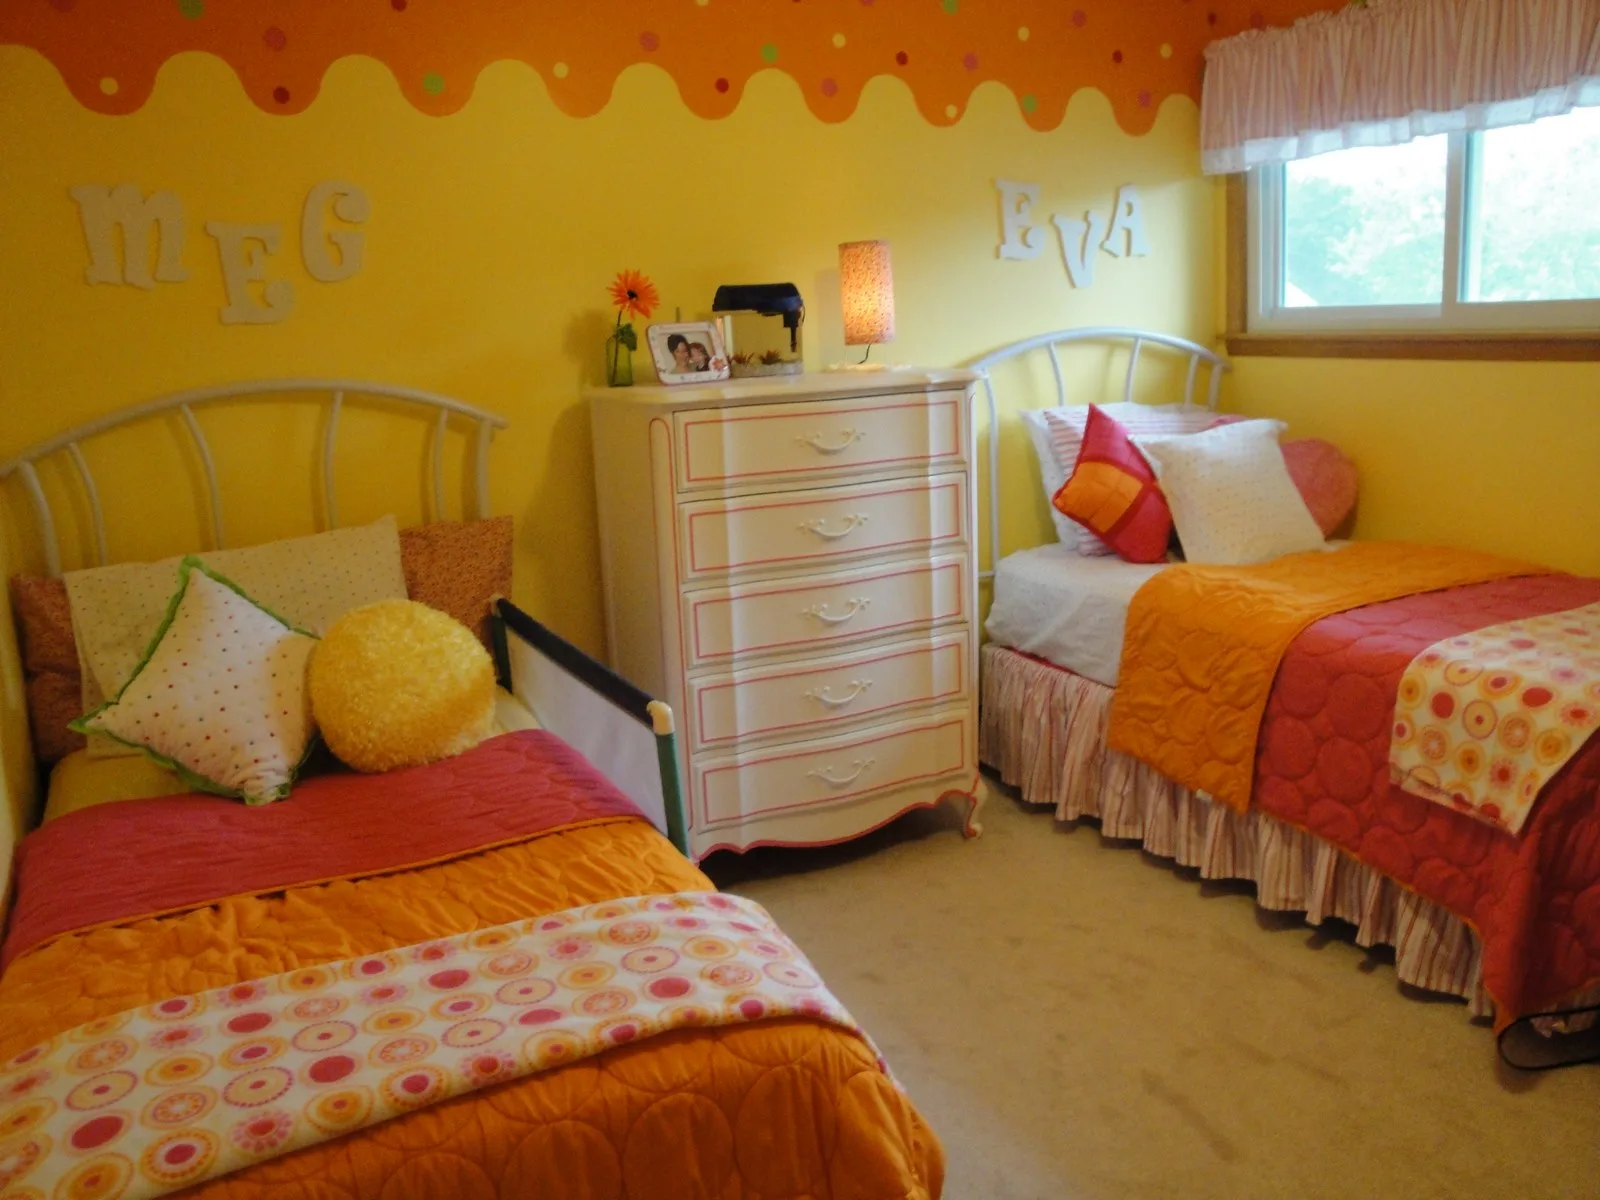
Allow me to introduce the end results, and give you a few steps I took along the way that allowed me to create a room that makes me smile each time I walk through the door without breaking the bank. Perhaps you can incorporate some of these ideas into your child’s room.
Choose Your Bedding as a Basis for Your Color Palette
Shop sales, preferably clearance, but make sure it’s bedding that really strikes you.
Growing up, we always shopped on the clearance rack for our clothes. We would walk through stores with blinders on for the first 20 racks and head straight to the clearance section in the back. That was the only real option to consider. This sticks with me even today. I rarely consider purchasing a full-price item.
So, on this one particular night, I was strolling the aisles of Target’s home section when I discovered some bedding that had much of the “look” and colors I was hoping to find.
At the same time, over half of the pieces in this set had nice little red tags on them signaling a clearance. I debated, calculated, and purchased a bedspread, multiple sets of sheets, and two throw pillows.
Bedding is a good place to start the palette for your room. It’s ok to have an idea in mind in regards to colors or a certain style but make sure bedding actually exists for it.
Once my Mom and I chose colors for my room first, even painting the walls in a very creative manner, but then had an incredibly difficult time matching any curtains or bedding to my vibrant color choice.
We made it work in the end, but I wouldn’t make that same mistake twice. Often you have one idea of what you want, but in shopping for bedding you find another style or different colors that catch your eye instead. Go for what you like and make sure it’s on sale or at the very least in your budget.
If You Have a Secret Weapon, Use It
My mother-in-law loves projects and has the heart to serve. She’s also extremely good at sewing, and I have recruited her numerous times for home sewing projects.
Maybe you have a special talent or a special “helper” with a special talent. Embrace it and incorporate it into your room’s design. I asked my mother-in-law to sew up a curtain and a bed skirt with the extra sheet sets I purchased.
We used some of the leftover fabric for extra pillows (we covered old pillows with new fabric, so no “stuffing” had to be purchased). If you’re like me and you don’t have a sewing skill in your body, try to think outside the box.
My friend has a sister that’s a great artist, and she recruited her to paint a mural on her daughter’s wall. It became a delightful focal point in her room. The nice aspect of a loved one helping you is that their fingerprints are represented throughout the room.
If you have a special talent you can do it on your own, even better. The nice part of doing things yourself is you end up with special touches you can’t buy.
Refurbish Old Furniture
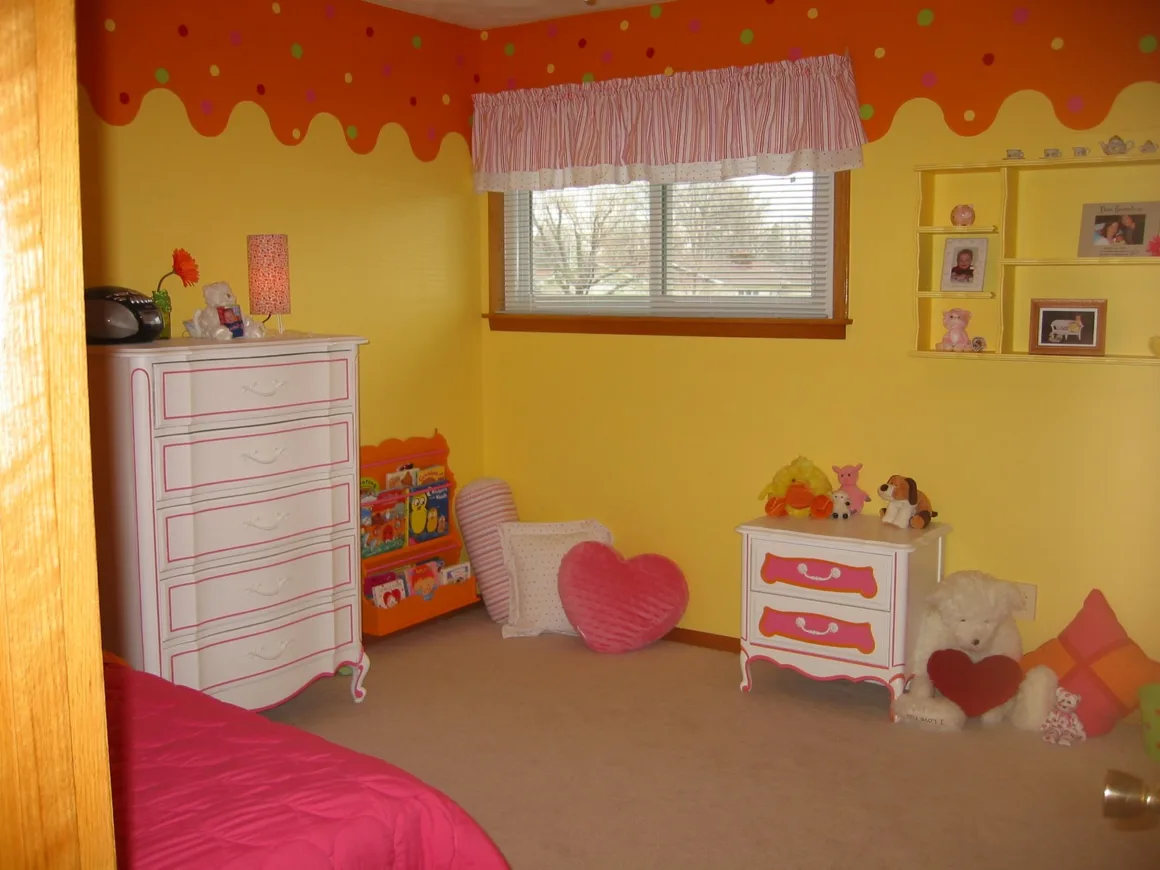
After researching the cost of a new nice-quality dresser, I felt overwhelmed by the prices. So, my mom and I decided to visit a used furniture store. Furniture was stacked upon furniture. You had to be looking for your treasure.
Some furniture was dated in a good way and others left much to be desired. We walked through narrow aisles scanning the piles.
I spotted a dresser that had a really fun shape and a nearby nightstand that had a similar style (though not actually an exact match). They were both sturdy, good quality, and probably top quality in their day.
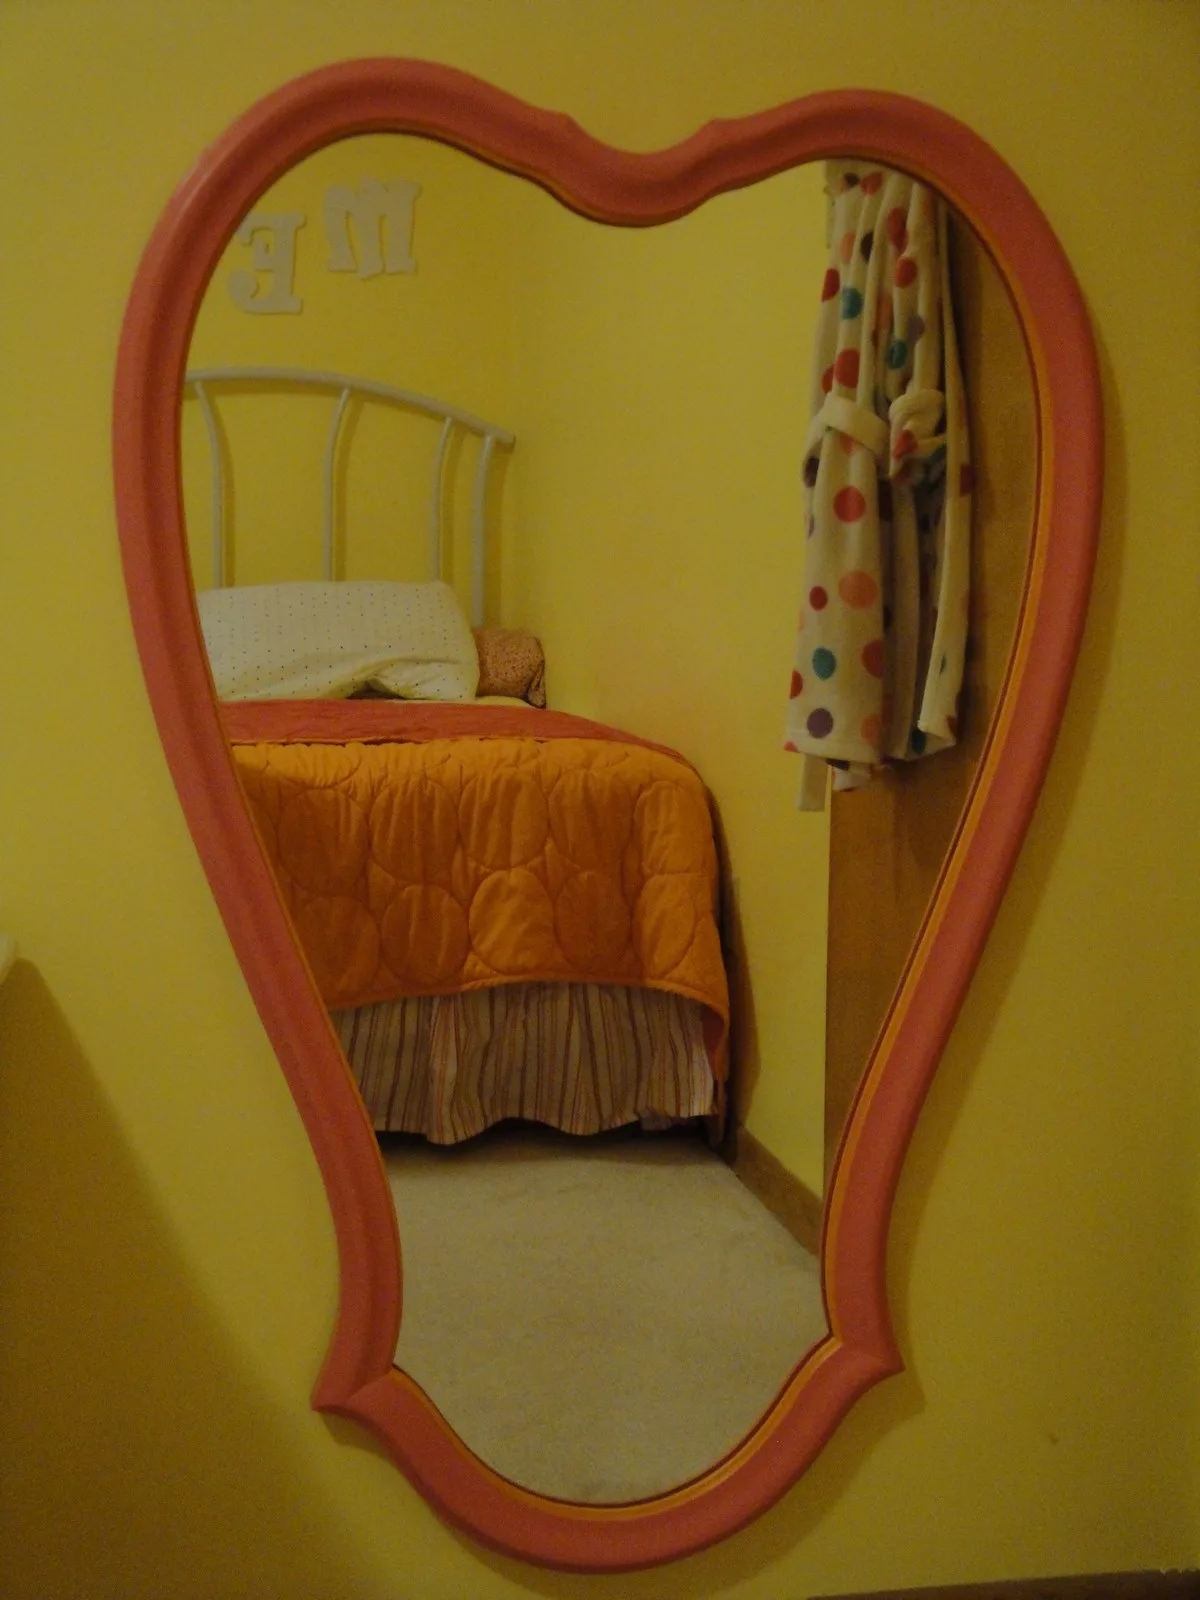
The finish on the dresser and nightstand was outdated, but that’s where PAINT comes in. I decided to buy them as a set and paint them white. Toward the end of our exploration at the store, we spotted an amazing mirror that we suspect may have been part of a set with the nightstand I planned to buy.
The practical side of me said it wasn’t a necessary piece, but the child in me found it irresistible.
All I could think of was “Mirror, mirror on the wall…” The price for a mirror was extremely reasonable, the addition to the room is fabulous, and best of all my two little girls (now four and two) love having a mirror their size for “dress-up” and dance times.
Sometimes a special piece is worth it. Though it’s been 2 years, I know we walked out with a dresser, nightstand, and mirror for around $300-350. Later, my mom picked up an old magazine rack at an antique store for a low price.
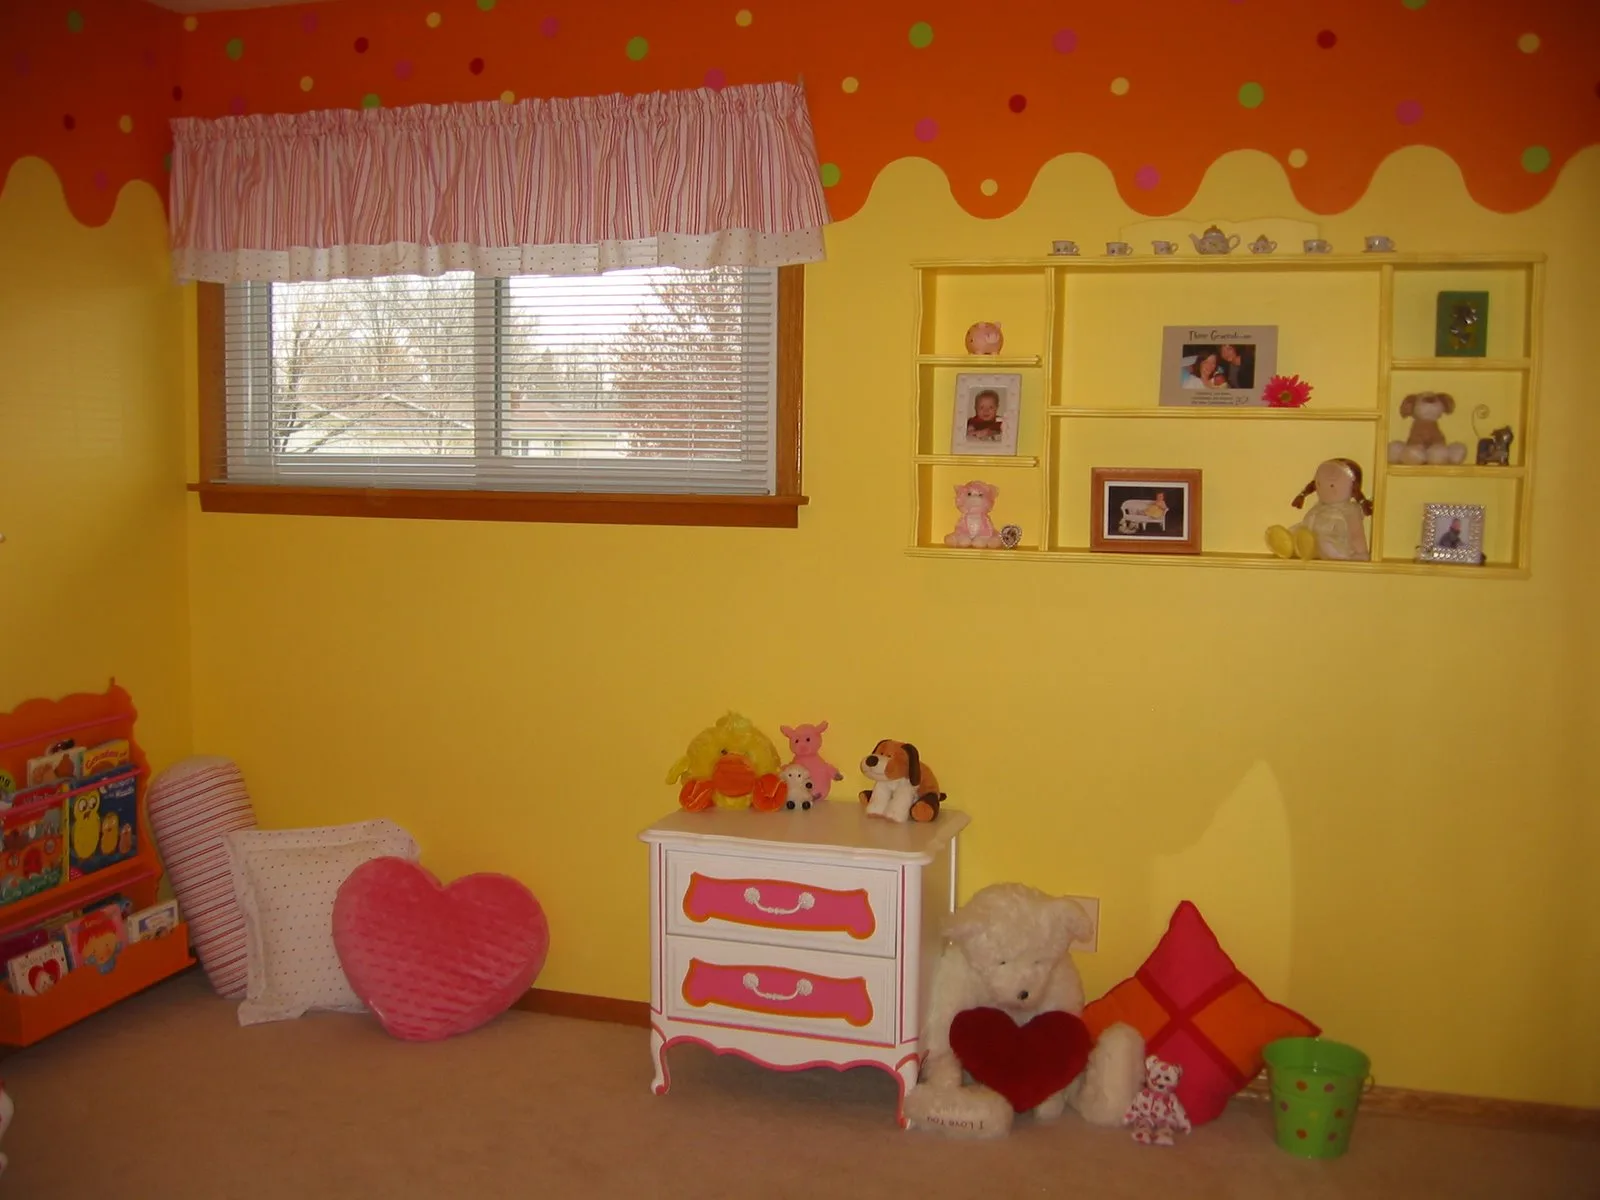
With a little paint, it became an adorable unique bookholder for the room. The yellow shelf on the wall was an old shelf from my room as a little girl, once again painted.
Put in Some Effort
Dare yourself to be creative with a palette of paint or special touches.
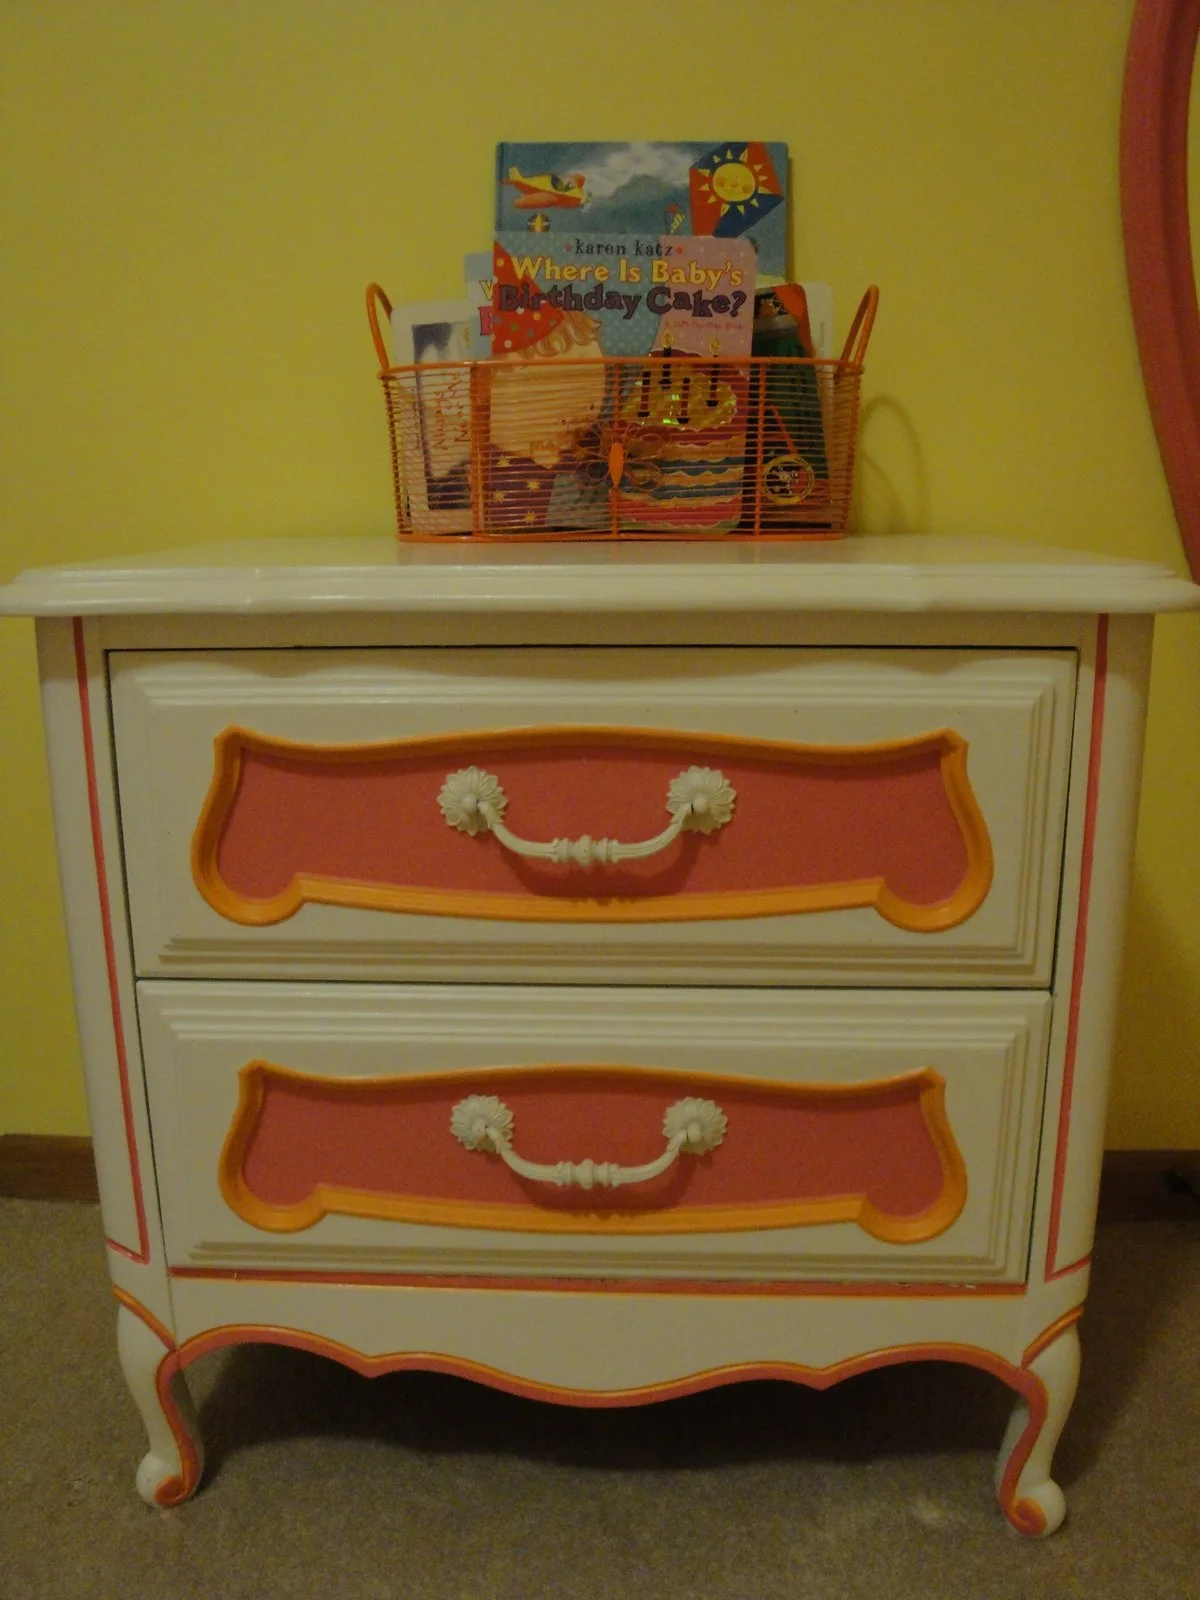
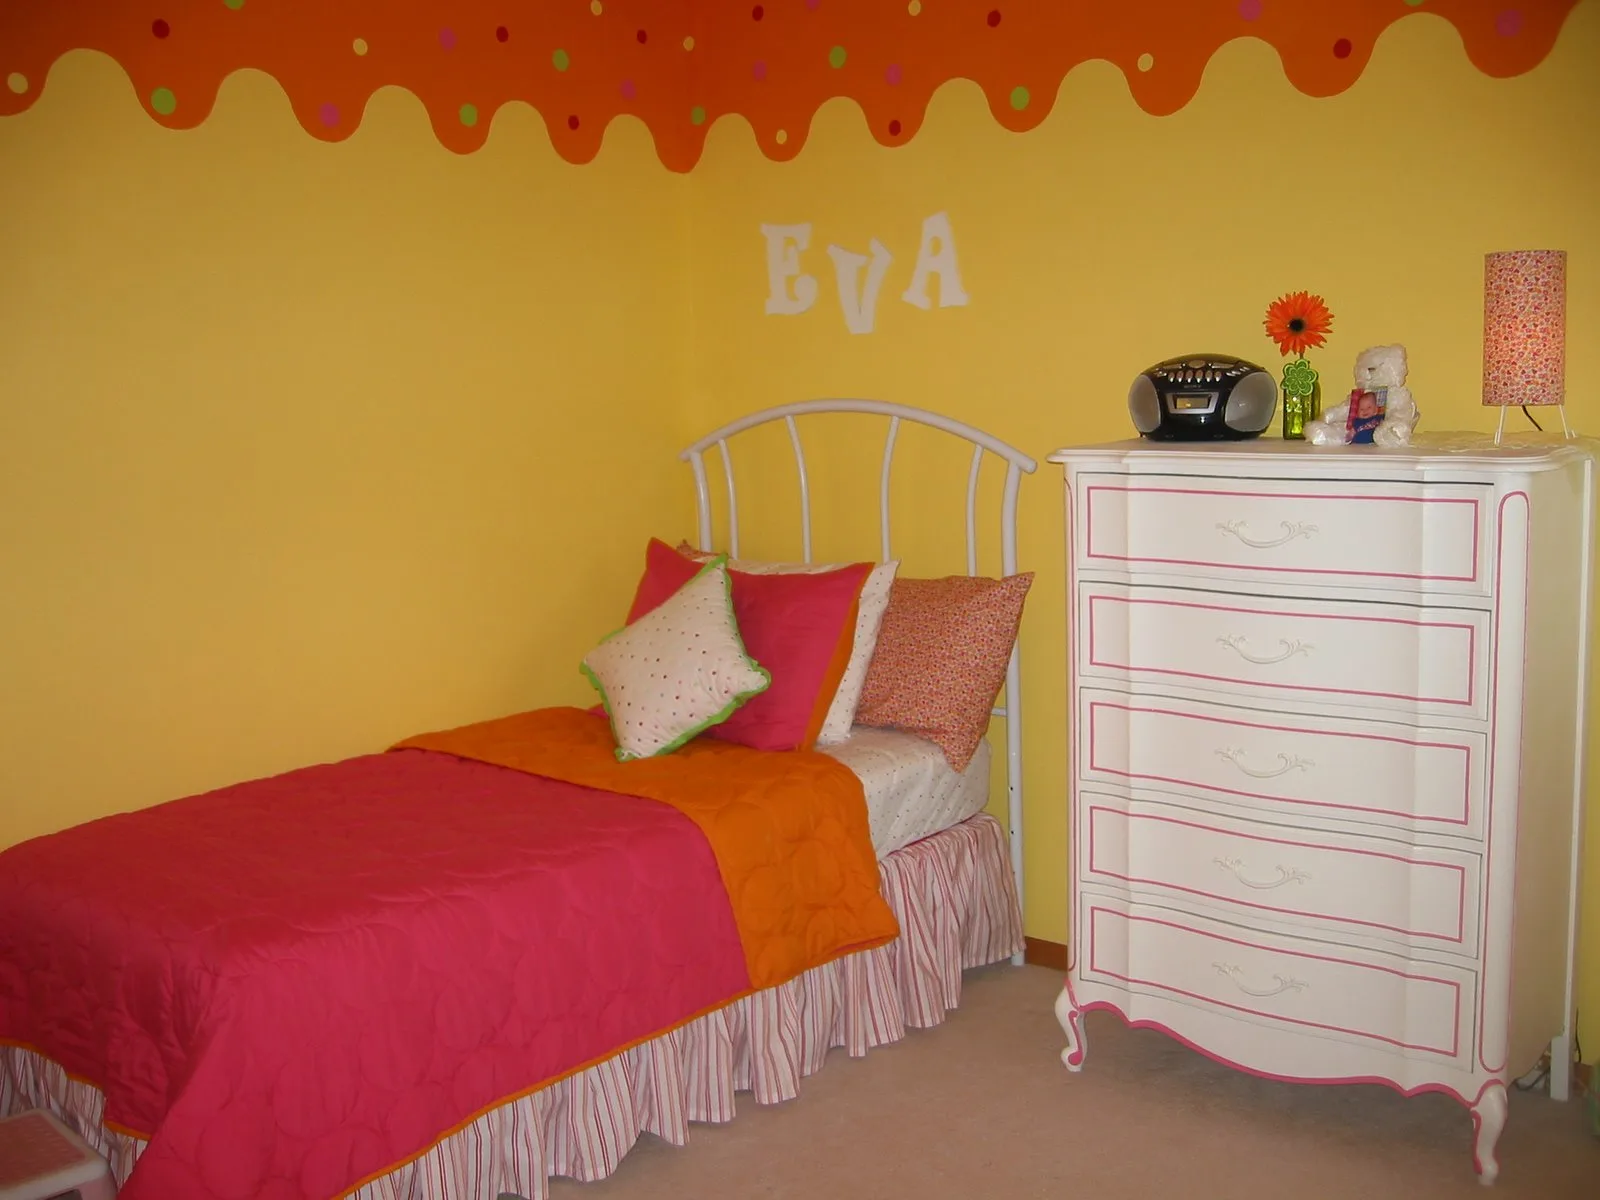
Paint comes cheap, but painting furniture well isn’t easy. I spent a lot of time painting every piece of furniture for my daughter’s room, and swore by the end I would never paint furniture again. But, I would. I would do it again for the same satisfying results. Allow me to recommend a little creativity in the painting.
On the one hand, I considered keeping the furniture all white so that I could reuse it in any room without having to repaint it. But, there were so many details in the furniture that I could really make pop by adding some color. In the end, those small detailed touches added to the personality of the room.
I don’t regret the extra effort for a little more fun.
Go Beyond Plain Painted Walls for Something a Little More Exciting
This is more achievable in a children’s room where your imagination can soar. Search for painting and decorating ideas online or in decorating magazines.

In a design magazine for children’s rooms, I saw a border for a room centered around the sea that inspired me. The room had a large upper border with wave crest shapes. I adapted that idea into more of a curved border with polka dots to match the bedding. I was amazed at how simple it ended up being.
First, we painted the wall the base color (in our case yellow) up to the top, avoiding the time-consuming trim painting. Then, I cut the basic curved shape out on some poster board (basically tracing half circles from a large bowl in my kitchen).
My husband would hold it up straight on the wall, and I would pencil the curved line on the wall.
Later, he rolled the top part, while I took a small brush (about one-inch width) and painted along the penciled line filling in the curved area where the roller couldn’t reach. The polka-dots were super simple with the purchase of some cheap circular sponges (attached to a wooden handle) for painting at a local craft store.
Dip in the paint of your choice and punch onto the wall. Incredibly simple and rewarding to hear my 2-year-old rave about the “bouncy balls” on her walls. I really do believe the border is an instant eye-catcher in the room.
Find Some Cheap Little Accent Pieces
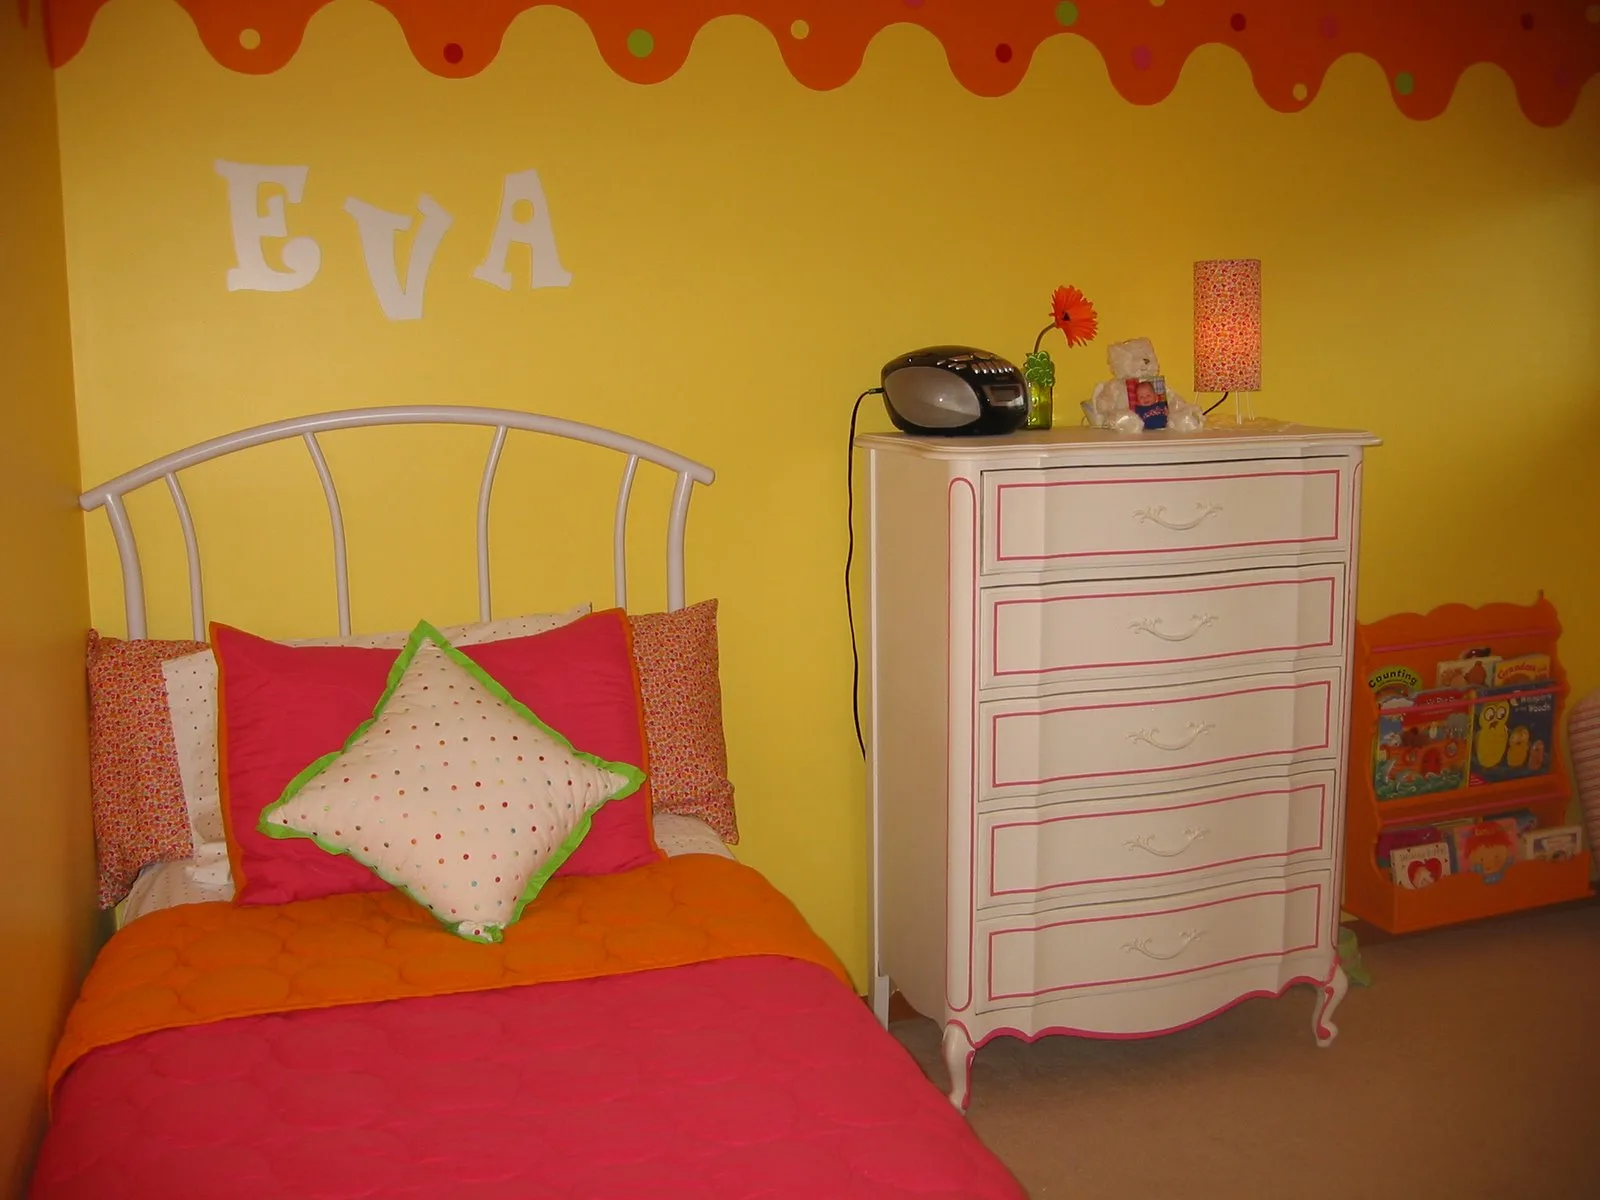
I purchased letters for her room to spell her name. I skipped the costly Pottery Barn options and went to Hobby Lobby where I purchased whimsical letters originally at $2.50 a piece but on sale (as wall hangings there often are there) for 50% off for a total of $1.25 per letter.
Not bad, especially for a three-letter name like my daughter’s. I also found some cute fabric at the fabric store and then bought a cheap lamp kit at Hobby Lobby where you simply stick the fabric right onto the sticky lamp shade.
You don’t even have to sew! Lamps can be pricey, but this was of minimal cost and an extremely easy craft. We use a night-light bulb in the lamp, and the lamp stays on through the night to make the room less dark for little ones.
Most of the other decorations were ones I already had whether frames from other rooms, toys, trinkets, or a few mementos from my childhood days.
If You KNOW, Plan Ahead. In Our Case… A Room for Sisters
In our case, we were certain that someday we would have a third child, so our two daughters would share a room. In fact, I waited to design this room until I found out if our second child was a girl or a boy. I was elated to decorate an all-girls room.
Now, two years later, my oldest daughter is sharing this room with her little sister. We did end up buying two of the same bedspreads and two sets of sheets ahead of time, while my mom got a steal on two matching headboards that she negotiated with the furniture salesperson for a better price and gifted to us.
It’s a little extra cost upfront, but not as much money as if we had to start all over again just two years later or not as much hassle as if we tried to find a matching or coordinating bed set after nearly two years.
In the end, we produced one of my favorite rooms in the house and a place my little girl was excited to make her own. Even after two years, I still smile entering this room. And the transition into a room for two came easily for two little sisters that enjoy sharing a space they love. We didn’t have to make a large payment (or obtain debt) for new furniture.
True, money is often replaced with effort and time, but with every paint brush you pick up and every idea you engage, your imagination finds a home on the palette of your child’s room.