Table of Contents Show
A smart thermostat, specifically the Google Nest Thermostat, is an innovative device designed to revolutionize your home’s heating, ventilation, and air conditioning (HVAC) system. This cutting-edge device not only provides intuitive smartphone interfacing for seamless control and monitoring, but it also boasts an array of advanced features that elevate its functionality beyond just temperature regulation.
Key Features of a Google Nest Thermostat
Let’s delve into some of the remarkable features that make the Google Nest Thermostat an essential component of your smart home:
- Smartphone Interfacing: With the Nest App on your mobile device, you can easily adjust your home’s temperature from virtually anywhere. Whether you’re in bed or away from home, you have full control over your HVAC system at your fingertips.
- Energy Tracking: The Google Nest Thermostat helps you save energy and reduce your utility bills. It provides detailed reports on energy usage and offers suggestions on how to optimize energy consumption.
- Proximity Sensors: This feature allows the thermostat to detect when you’re at home or away. It then automatically adjusts the temperature settings accordingly for maximum comfort and efficiency.
- Geofencing: The Google Nest Thermostat is equipped with geofencing technology. This means it can use your smartphone’s location data to determine when you’re arriving home or leaving, adjusting the temperature settings preemptively.
Indeed, with these features, your thermostat goes from being just a simple control panel to a vital pillar of your smart home ecosystem.
Preparing for Installation
Before we get into the actual installation process, it’s important to note that you’ll need a few tools at hand:
- A screwdriver
- A pre-drill (if required)
- The Nest app installed on your smartphone for step-by-step guidance
In addition to these tools, it’s also crucial to ensure that the Google Nest Thermostat is compatible with your HVAC system. This can be determined by checking the thermostat wires and their designation in your current setup. Notably, you will need a C-wire installation for the thermostat to function correctly.
Stay tuned for more in-depth steps on the actual installation process, which we’ll cover in a subsequent section of this guide.
Setting the Stage: Preparing to Install a Google Nest Thermostat at Home
If you’re considering taking on this DIY project, it’s essential to understand what’s required. Installing a Google Nest Thermostat isn’t as daunting as it may seem, provided you have the necessary tools and preparation in place.
The Essential Tools
Having the right set of tools can make your installation process smoother and more efficient. Here are the primary tools you will need:
- Screwdriver: This is a basic requirement for most DIY installations, and the Nest thermostat is no exception. The screwdriver will be used to secure your new thermostat to the wall.
- Pre-drill (if required): Depending on your wall type, a pre-drill may be necessary before screwing in your Nest thermostat. This tool helps create pilot holes that make it easier to insert screws without damaging your wall.
- Nest App: Although not a physical tool, having the Nest app on your smartphone is equally crucial. It provides step-by-step instructions during the installation process and also allows you to control your thermostat once installed.
Note: Ensuring these tools are at hand before beginning your installation can save you time and prevent unnecessary interruptions.
Pre-Installation Preparation
Aside from having the essential tools, there are a few more steps to take before you start installing:
- Power off your HVAC system: Safety should always come first when working with electrical systems. Ensure you turn off power to avoid any risks.
- Check system compatibility: Not all HVAC systems are compatible with Google Nest Thermostats. Confirm that yours is by checking wire designations in your current setup.
Once these steps are completed, you’ll be ready to proceed with confidence as you install your Google Nest Thermostat at home.
Step 1: Check System Compatibility
Before diving into the installation process of your new smart thermostat, it’s paramount to ensure compatibility with your existing HVAC (Heating, Ventilation, and Air Conditioning) system. This step involves a careful inspection of the thermostat wires and their respective designations within your current setup.
Here’s how you can go about this:
- Identifying Thermostat Wires: Your existing thermostat should have multiple wires connected to it. These could be color-coded or labeled with specific letters that indicate their function. For instance, “R” usually indicates a power wire, while “W” is typically for heating control.
- The Importance of the C-Wire: The majority of smart thermostats require what’s known as a ‘C-wire’ (or Common wire) for installation. This wire provides continuous power to the thermostat, ensuring all its smart features function correctly. If you don’t see a C-wire in your current setup, don’t panic yet. You might still have one hidden behind the wall or within the wiring panel.
Interesting Fact: The C-wire gets its name from being ‘common’ in that it often shares power among multiple devices within an HVAC system.
- When You Don’t Have a C-Wire: In instances where a C-wire is not present, you might need professional installation assistance or an adapter kit designed specifically for such situations. These kits can provide the necessary power for your smart thermostat without the need for rewiring your entire HVAC system.
Remember, if at any point during this process you feel unsure or uncomfortable, do not hesitate to reach out to a professional HVAC technician for help.
Step 2: Power Off Your HVAC System
Before diving into the process of installing your new smart thermostat, it’s crucial to take a safety-first approach. That means powering off your Heating, Ventilation, and Air Conditioning (HVAC) system before attempting any work on the thermostat. This is an important step that should not be overlooked as it can prevent potential electric shocks.
Here’s how you can do it:
- Locate your breaker box: The breaker box or service panel is usually located in a utility area of your home such as a basement, garage, or utility closet.
- Find the correct switch: Within the breaker box, there should be a clearly labeled switch for your HVAC system. If it isn’t labeled, refer to the diagram that is often found on the inside of the door of your breaker box or consult with an electrician.
- Turn off the power: Flip the switch to the ‘off’ position.
Note: Apart from turning off the power at the breaker box, you can also turn off any power switches that may be directly connected to your furnace or air conditioner.
Interesting Fact: The term ‘HVAC’ was first used in the early 20th century with the invention of mechanical heating, ventilation, and air conditioning systems. Prior to this invention, these three functions were usually split between multiple devices.
Remember, it’s always better to err on the side of caution when working with electrical systems. If you’re unsure about any step in this process or feel uncomfortable handling electrical equipment, don’t hesitate to reach out for professional assistance from an HVAC technician or electrician.
Step 3: Disconnect and Label the Wires of Your Old Thermostat
Before you start disconnecting the wires from your old thermostat, make sure you’ve turned off the power to your HVAC system at the breaker box as discussed in the previous steps. Safety should always be your top priority when working with electrical systems.
Removing the Cover
Start by removing the cover of your old thermostat. This is usually as simple as pulling it straight off, but some models might have screws that need to be undone. Consult your thermostat’s user manual if you’re unsure about how to remove the cover.
Identifying and Labelling the Wires
Once you’ve removed the cover, you’ll see a number of wires connected to different terminals. These may be color-coded, but don’t rely on color alone for identification.
Each terminal corresponds to a specific wire type and has a letter designation such as “R” for power, “W” for heat, “Y” for air conditioning, and so on. Note down or take a picture of the wire configuration before starting with disconnection. This will serve as a handy reference later on.
Next, disconnect each wire carefully from its terminal. As you do this, label each one with its corresponding terminal letter. You can use small pieces of masking tape for labels.
Pro Tip: Using a digital camera or smartphone to take a picture of how your old thermostat was wired can be incredibly helpful if you get confused during this step.
Remember to keep track of which wires were connected together. For example, in some systems, the “R” wire may be connected with either an “RC” or “RH” wire.
By taking time to identify and label all wires during this step correctly, you’ll make installing your new smart thermostat much easier when we move on to step 4.
Step 4: Install the New Mounting Plate and Trim Plate
Now it’s time to install the mounting plate, which serves as the base for your new smart thermostat. This is a crucial step as it ensures your thermostat is securely attached to the wall.
The Nest Learning Thermostat comes with a customized wiring diagram in its guide. This diagram is a tailored roadmap for your specific home setup, ensuring a seamless installation process. Here’s how you can use this guide:
- Follow the provided diagram closely when determining wire placement.
- The diagram will indicate the correct terminals for each wire.
This tight adherence to the guide will result in an accurate and efficient base installation, setting you up for success in the later steps.
In case there are any unsightly holes or marks left behind by your previous thermostat, Nest provides a trim plate in its package. This trim plate acts as a cosmetic cover-up, providing a clean and professional look to your installation.
Here’s how to use it:
- Align the trim plate with the mounting plate.
- Secure them both onto the wall using the included screws.
One key point to note while installing the mounting and trim plates is maintaining levelness. To ensure straight placement:
- Use a bubble-level tool during installation.
- Adjust accordingly until the bubble is centered between the lines.
By ensuring levelness, you ensure optimal functioning for your Nest Learning Thermostat.
Remember, taking time to correctly install these components now will save you potential troubleshooting down the line.
Step 5: Reconnect the Wires to the Nest Learning Thermostat
At this point, you are ready to reconnect the wires to your new smart thermostat. The Google Nest provides a specific wiring diagram for this process. This diagram is designed to simplify the process and ensure that you connect each wire correctly.
Following Google Nest’s Wiring Diagram
Google Nest’s wiring diagram is your key guide. It will indicate the correct terminals for each wire, allowing you to accurately reconnect each one. Make sure you follow this diagram closely:
- Identify each wire coming out of your wall.
- Compare it with the corresponding color or label on the Google Nest wiring diagram.
- Connect the wire to the matching terminal on the Nest base.
Note: Be cautious during this step as improper wiring can lead to malfunctions or even damage your HVAC system.
Dealing With a Missing C-Wire
If your system doesn’t include a C-wire (also known as “Common Wire”), there is no need to panic. Some older HVAC systems might not have this wire which provides continuous power to smart thermostats. In such cases, you might need jumper wires for proper power supply to the smart thermostat.
A jumper wire is essentially a short electrical wire with alligator clips at both ends. Here’s how to use it:
- Connect one end of the jumper wire to the C-terminal on your thermostat base.
- Attach the other end of the jumper wire to the RC or RH terminal, depending on what’s available in your HVAC system.
With these steps, you should be able to successfully reconnect all necessary wires and establish a reliable power supply for your Nest Learning Thermostat.
Remember, proper installation of these components now will save you potential troubleshooting down the line.
Fun Fact: The term “jumper” wire comes from its function – it “jumps” electrical signals from one terminal to another!
Keep in mind that while using a jumper wire can provide temporary power to your thermostat, it’s always recommended to have a dedicated C-wire installed. This ensures a stable power supply and prevents any potential issues with your HVAC system or smart thermostat in the future.
If you’re unsure about the wiring process or need further assistance, it’s best to consult a professional HVAC technician. They have the expertise to handle these installations safely and efficiently, giving you peace of mind and optimal performance from your Nest Learning Thermostat.
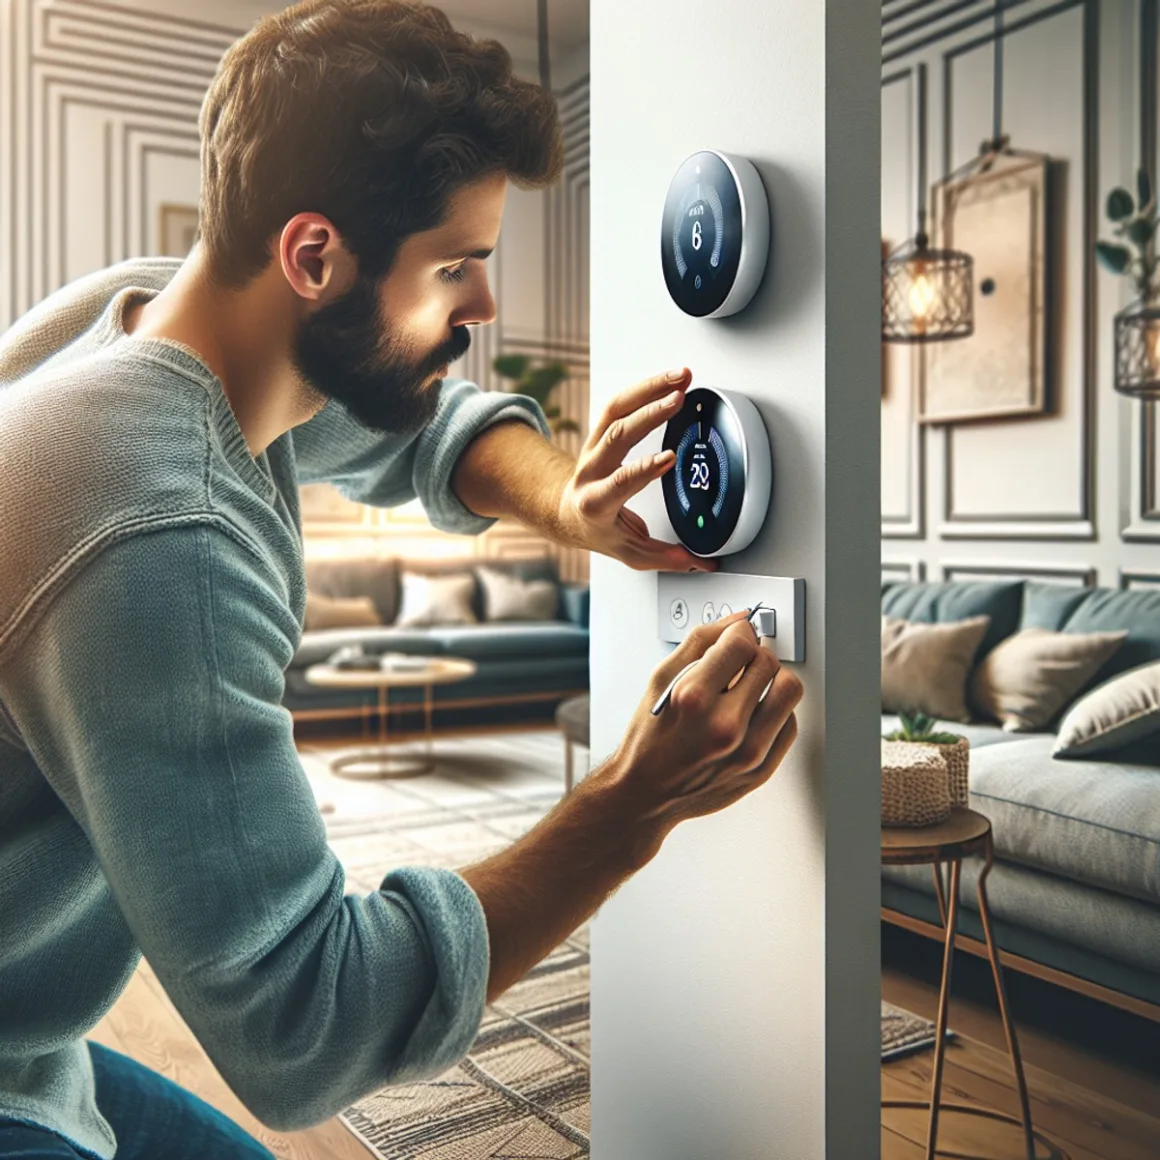
Step 6: Attach the Nest Base and Display
Once you’ve successfully connected all necessary wires, the next critical step in the installation process is attaching the Nest base and display. This step isn’t just about aesthetics – it’s also about ensuring that your Nest Thermostat has a secure fit for optimal performance.
Follow these sub-steps to ensure a correct and secure attachment:
- Align the Nest Base: Hold the Nest base with one hand and gently align it with the mounting screws on your wall or HVAC system. Make sure that the base is level – a crooked base can lead to inaccurate temperature readings.
- Secure the Base: Once aligned, tighten the screws to secure the base in place. Don’t over-tighten as this could harm the base or cause alignment issues.
- Attach the Display: Now, take your Nest display (the main unit) and align it with the base. It should fit onto the base without any obstructions.
- Snap into Place: Once properly aligned, gently push until you hear a ‘click’ sound. This confirms that the display has successfully snapped into place on the base.
Remember: The key here is to ensure everything aligns accurately and snaps into place correctly. A misaligned display may not function properly, potentially causing inconsistencies in temperature regulation or other functionality issues.
Did You Know? The Nest Learning Thermostat’s sleek design isn’t just for looks – its circular shape allows for easy rotation, which is how you navigate through menus and settings!
If you encounter any difficulties during this process, don’t hesitate to reach out to professional HVAC technicians for assistance. They’re equipped to handle these installations flawlessly, ensuring that your smart thermostat works exactly as it should.
Step 7: Switch Your HVAC System Power Back On
After successfully completing the installation of your Google Nest Thermostat, it’s time to bring your HVAC system back to life.
- Locate Your Circuit Breaker: The first step is to locate your home’s circuit breaker. Usually, this is in a utility room, basement, or garage.
- Identify the Correct Switch: Within the circuit breaker panel, you should find a switch that controls the power supply to your HVAC system. It may be labeled as ‘HVAC’, ‘Heating’, or ‘Air Conditioning’. If you’re unsure which switch it is, refer back to the label you applied in Step 1 when you turned off the power.
- Flip the Switch: Gently flip the switch back to its original position. This action will restore power to your HVAC system.
Important Note: Always ensure that your hands are dry before touching any electrical switches or panels. Safety should always be your top priority.
- Check Your Nest Thermostat: Now head back to where your new Nest thermostat is installed. You should see it powering up and ready for setup.
Did You Know? It usually takes about a minute for the Nest Thermostat to start up after restoring power.
This marks the end of the physical installation process for your Google Nest Thermostat! Now, all that’s left is to set it up through your Wi-Fi connection and start to enjoy its smart features.
Remember, if at any point during this process you encounter difficulties or feel uncomfortable handling electrical components, don’t hesitate to contact professional HVAC technicians who can safely complete these steps for you.
Step 8: Setting Up the Nest Thermostat
The final step in your Google Nest Thermostat installation involves setting up the device using your Wi-Fi connection and the dedicated Nest app. This process is crucial to fully utilize the myriad of smart features your new thermostat offers. Below are the key steps you need to follow:
- Download and Install the Nest App:
- If you haven’t done so already, download the Nest app from either the Google Play Store or Apple App Store depending on your device.
- After installing, open the app and create a new account if you don’t have one. Ensure that your login credentials are strong and secure.
- Connecting to Wi-Fi:
- The app will prompt you to connect your Nest Thermostat to your home Wi-Fi network.
- Make sure your phone is connected to the same network that you want your thermostat to use.
- Setting Up Geofencing:
- One of the smart features of this thermostat is geofencing, which uses your smartphone’s location data to determine when you’re home or away.
- The app will guide you through enabling this feature, ensuring optimum energy efficiency based on your movements.
- Energy Tracking:
- Your Nest Thermostat can track energy usage, giving you insights into how much energy you’re consuming and helping you find ways to save.
- Follow the instructions on the app to set up this feature.
- Customizing Other Smart Features:
- The Nest app also allows for customization of other features like scheduling temperature changes and receiving alerts for extreme temperatures.
Did You Know? The Nest Thermostat learns from your habits over time and can start making adjustments autonomously based on patterns it recognizes.
By following these steps as guided by the Nest App, you’ll be able to successfully set up your Google Nest Thermostat. Remember, professional HVAC technicians are available to help you if you encounter any difficulties during the setup process.
Why Choose a Nest Pro Installation?
Installing a smart thermostat like Google Nest is generally a straightforward task, especially for those who are comfortable with DIY projects. However, there are numerous benefits to consider in opting for a professional installation. Services such as Ontech or Nest Pro offer advantages that can ensure an optimal setup and long-term performance of your smart thermostat. Here are some key reasons why you might want to consider this option:
Safety First: Avoiding the Risk of Electrocution
Working with electrical systems always carries the inherent risk of electrocution. Professional installers are trained in safety protocols specific to handling these systems. They’re knowledgeable about the latest safety standards and they have the right tools to carry out the job safely. This ensures not only their safety but also the safe operation of your newly installed smart thermostat.
Enjoy Extended Warranty Benefits
Some manufacturers offer extended warranties specifically for professional installations. This means that should anything go wrong with your device within the warranty period, you’re covered for repairs or even replacement. While initial investment in professional installation might be higher, it can pay off in the long run by providing peace of mind regarding potential future issues.
Guaranteed System Compatibility
One of the biggest challenges in installing a smart thermostat can be ensuring compatibility with your existing HVAC system. A professional installer has the expertise to assess whether your system is compatible with a smart thermostat before proceeding with installation. This can save you from potential headaches down the line associated with incompatible devices.
Leverage Expert Knowledge for Optimal Performance
Professional installers have access to industry-specific tools and knowledge that may not be readily available to a DIY enthusiast. Their training ensures that they understand the ins and outs of different devices and systems, allowing them to optimize every feature of your smart thermostat according to your home’s specific needs and layout.
While DIY installation might seem appealing, considering professional installation offers significant benefits that can enhance your experience with a smart thermostat. Safety, extended warranty, guaranteed compatibility, and optimal performance are just a few reasons why you might want to opt for professional installation.
Understanding the Complexity of DIY Thermostat Installation
Installing a Google Nest Thermostat or any other smart thermostat can indeed be a hands-on DIY project. Yet, it demands a meticulous approach, especially when dealing with thermostat cable wiring. The wiring part involves connecting small, color-coded wires to specific terminals in the new thermostat—a task that may seem straightforward but is fraught with potential pitfalls.
If you’re dealing with these complex systems for the first time or if you’re not confident about your technical skills, things can quickly get tricky. Here’s what you need to know:
- Understanding the Wiring: Each wire serves a different purpose, and miswiring can lead to malfunctioning or even damage to your HVAC system.
- Dealing with Different Systems: Not all thermostats work with all HVAC systems. You might face compatibility issues if your heating and cooling system is older or non-standard.
- Configuring Advanced Features: Smart thermostats like Google Nest offer advanced features like energy-saving schedules and remote control through apps. Setting up these features requires careful attention to detail.
The Value of Professional Assistance
Given these complexities, if you’re unsure about any step of the process or your system’s compatibility, it might be best to opt for professional installation. Professionals bring a lot more than just installation expertise:
- System Compatibility Check: A professional will first assess whether your existing HVAC system is compatible with the chosen smart thermostat.
- Wiring Expertise: They have the experience to handle intricate thermostat cable wiring, reducing the risk of damage or malfunctioning.
- Advanced Configuration: Professionals can help set up and optimize advanced features according to your home’s specific needs and layout.
Therefore, while DIY has its appeal for hands-on homeowners when it comes to smart thermostats, professional installation can offer peace of mind by ensuring safety, compatibility, and optimal performance from day one.
FAQs(Frequently Asked Questions)
The Google Nest Thermostat comes with features such as energy-saving capabilities, remote control via a smartphone app, compatibility with smart home systems, and the ability to learn your temperature preferences over time.
Essential tools for installing a Google Nest Thermostat include a screwdriver, a level, a power drill, and possibly a voltage tester to ensure safety.
Before installation, it’s important to check if your HVAC system is compatible with the Google Nest Thermostat by using the compatibility checker tool provided by Google.
If your system doesn’t include a C-wire, you can use alternative methods such as using an adapter or seeking professional assistance to install a C-wire.
Choosing a Nest Pro Installation ensures that your smart thermostat is installed correctly and optimally, and it may also provide extended warranty benefits from the manufacturer.
To avoid the risk of electrocution, it’s important to turn off the power to your HVAC system before starting any installation work and follow all safety precautions provided in the installation guide.